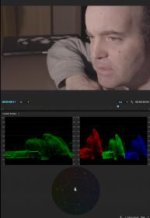
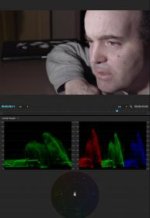
Trying to get natural skin tones from Sony A7s S-Log2 footage using PPCC 2015 Lumetri

Off the top of my head I think it is 1/8 plus green. I've been experimenting between an 1/8 and a 1/4 as my biax flo units w osram bulbs have a tiny touch of green so I find as long as they are close the balance works so I might have gone a little heavy with the 1/4. I'll get the gel # when I'm back in the office. I ended up just cutting it to the size of the panel and sliding it permanently in the slot the crappy diffuser panels go.
 
Hi starcentral,

Agreed. I actually never had any issues with LEDs when I used them with the C300, 1DC, or GH4. But I now see the issue when using them with the A7s. I've long been using LEDs for convenience since they never get hot and draw little power. But I see now that I'll have to consider other lighting options or modify the way I light with LEDs when it comes to the A7s.
 
Sorry I had to have a go at playing with some A7S footage.

A7S Grade_zpsskcdywzz.png


Graded in Sony Vegas with Film Convert using the A7S S-Log 2 S-Gamut Profile / Colour Curves / Cosmo / in a 32bit Floating Point 2.222 Project.

I tried using my F5-S-Log 2 ACES method which did not work because of the noise. I'm sure you could get far better results in Resolve which I'm trying to learn.
 
Nah, my highlights on forehead blown and whole image overly contrasted. I did it in colorista III however which its only my 2nd time using it.

I'll stick with Resolve but I like how in your Sony Vegas workflow you're able to get something that doesn't look like "sony".

:)
 
Hm, in that last one I do like the skin color itself but I think you have too much of the entire image going to orange. i.e. the highlights in the background are orange, the white parts of his eye, his teeth (okay maybe he's a smoker), etc..

My monitors are calibrated since I get a fair amount of colouring work, but I agree with what was said earlier that slog2/sgamut is pretty hard to grade. It's why for myself I've switched over to slog3/sgamut.cine on the other Sony cams.

Definitely looking too yellow-orange on my screen
 
Start with some plus green, light ones like 1/8 or 1/4 as you can always double them up.

Also check out this thread, I think these are the same lights as yours. Also mentions how low the CRI is, again why I never use LED's… too afraid of what it will do to my image:

http://www.dvxuser.com/V6/showthread.php?330742-Adding-Plus-Green-to-LED-Panels

The original footage very much looks like results I get on Nikon and Sony cameras under cheap "Fresnel" LED lights I have (that are still decent for money I think). Plus green gel has helped a lot for me, but can be a hassle to setup.
 
Yeah don't get me wrong, LED lights can be fantastic - especially for the money but I just stress myself out over what kind of color shifts I might get later on so I just tend to avoid using them. I'm just a sissy about it but not afraid to admit it.
 
Interestingly enough, I believe I've had better results with the tiny Zylight Z90 than with my Ikan 576s. I don't know whether the Z90 has a higher CRI but I'm having less trouble with color shifts when I use the Z90 and A7s. I'll try to post some tests later tomorrow if possible or by this weekend for sure.
 
Same problem as before. I think I've been able to get rid of the magenta cast in the corrected version using the Lumetri color panel in PPCC 2015. The image might be too cold in temperature, but that was the best way I could find to get rid of the magenta issue.

BTW, is there a reason dvxuser displays the images so small? Is there a posting setting I'm missing?
 
Is this more in line with what you're attempting to get?

Two versions. First is more of a "correct" one and the other more of a "creative" choice. Both done in Resolve. I didn't run into any sort of magenta issues with this method.

Four Nodes:
1. sLog2 to Linear LUT, exposure, color correction and saturation (these done last).
2. power window on face, lowering offset elsewhere in the shot
3. Linear to Cineon Log LUT
4. Juan Melara Kodak 2393 Print LUT

uTtWwIp.png


Five Nodes:
Same setup as above, but a node before the print LUT, pushing the Lift toward teal, mids to orange, and tinting the highs yellow slightly.
ttEZO3o.png
 
Power windows will work but you shouldn't have to resort to them for a standard "look" just to get your skin tones back.

That amount of work would kill you on any project where time or money was not budgeted for.
 
Hi Lochnessdigital, thanks very much for your help as well. The image to me seems a little too saturated and orangy for my taste, but perhaps mine doesn't have enough saturation. I'll admit that we're working from footage that wasn't properly balanced to begin with. Perhaps the orange I see in my face is the magenta cast coming back as saturation is dialed up. I'm going to be doing more tests this weekend and sharing better balanced S-log2 footage. Thanks again everyone for your help.
 
Nicholas,

I've never used Lumetri but you kind of need a node based system, or like in After Effects a way to make one set of color changes before the next set of changes.

So for example what I mean by that is your first change in the chain might be to remove the magenta, then your next set of changes would be to start adjusting the image to taste.

When you turn up the saturation you are turning up the magenta too, which is why for example you want to turn up the saturation AFTER you remove the magenta.

Again I don't know how Lumetri works but the more nodes you can have, or color corrections in "series" the easier it can be to control your image.

You could actually make a plus green/minus magenta LUT and load it onto all your clips as a base, then start correcting after that too as an option.

Lot's of ways to skin the cat.
 
Lumetri in Premiere works as an effect on a clip, and you can change the order of operations by using multiple effects in a particular order. Also, Lumetri does do color balance and exposure adjustments as basic corrections, before the LOOK/LUT is added. Separate Input LUTs may be applied before all corrections, but those are generally just used to get your format into the LOG format Lumetri uses internally.

BTW here it is with nothing but whitebalance temperature and tint adjustment in Lumetri and using the Slog2Sgamut-to-Slog2709 Input LUT and using Lumetri's built-in Fuji 250D Fuji 3510 Look.

C0015.00_00_14_09.Still001.jpg

Most of the other image people have posted have skintones that look way too red or orange to me. This looks a bit more realistic I think.
 
Last edited:
Noah that looks really great as a base, after that its easy to tweak exposure, crushing tones, etc..

Glad to hear Lumetri deals with order of operations properly.
 
Back
Top