
Navigation
Install the app
How to install the app on iOS
Follow along with the video below to see how to install our site as a web app on your home screen.
Note: This feature may not be available in some browsers.
More options
You are using an out of date browser. It may not display this or other websites correctly.
You should upgrade or use an alternative browser.
You should upgrade or use an alternative browser.
DIY IndieSlider...
- Thread starter ZazaCast
- Start date

drumbeatjay
New member
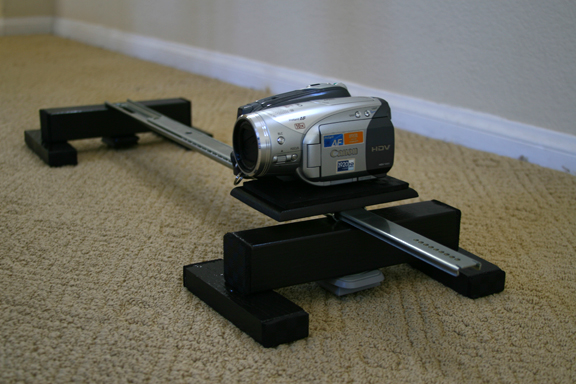
Just recently came across this thread (this is my first post/reply, not sure if i did it right), I was first looking into the GlideTrack but it was way to pricey for me. So I built my own cheap (around $30) solution. It's definitely not as slick as those made with igus parts, but it gets the job done.
Just needed a drawer slider, wood footing, 1/4 bolts and screws, some rubber stoppers, and some spray paint.
Here's what I ended up with (forgot to take a photo of it, but there are 1/4 nuts beneath the wood foots so two tripods can be screwed in, i'll take some photos of that):
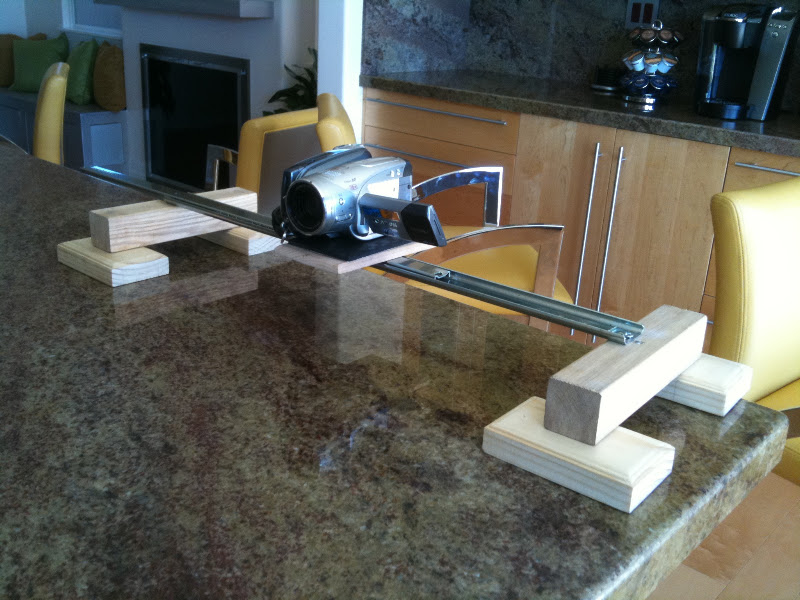
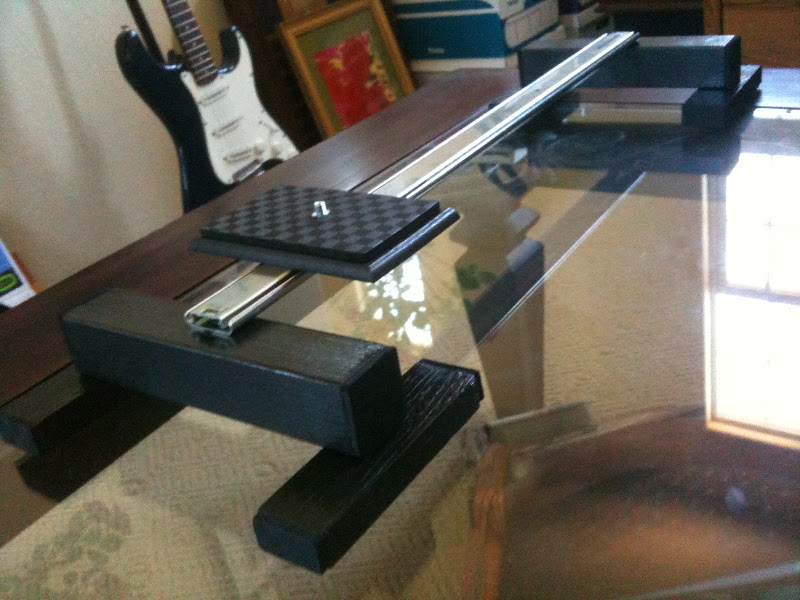
(hope i uploaded the photos correctly) Let me know what you guys think.
Jason
Just needed a drawer slider, wood footing, 1/4 bolts and screws, some rubber stoppers, and some spray paint.
Here's what I ended up with (forgot to take a photo of it, but there are 1/4 nuts beneath the wood foots so two tripods can be screwed in, i'll take some photos of that):
(hope i uploaded the photos correctly) Let me know what you guys think.
Jason
Last edited:

Jason Miller
Veteran
I used 2 of these same drawer slider in my moco rig as part of a shock absorbing system. they are pretty tuff
drumbeatjay
New member
Yeah this slider is definitely not the ideal design, but it was pretty cheap ($30) / fun to make. I'm still planning on making one with the igus parts, this is just a very low-budget option.
It slides about 30" across so I can get decent usage out of it, and it slides perfectly smooth (with a little help WD-40). I do need room on the sides, it sticks out about 14" on each side. I ended up just mounting it on the existing hole that was closest to the middle because I didn't want to bend the metal drilling a new hole.
It did only stop at one end, so to solve that I bent in the corners in of the side that didn't have a stop and it works fine. I'm planning on mounting a tripod head on it so it'll be a little more effective.
I'll post a link to some footage with it being used as soon as I get a chance.
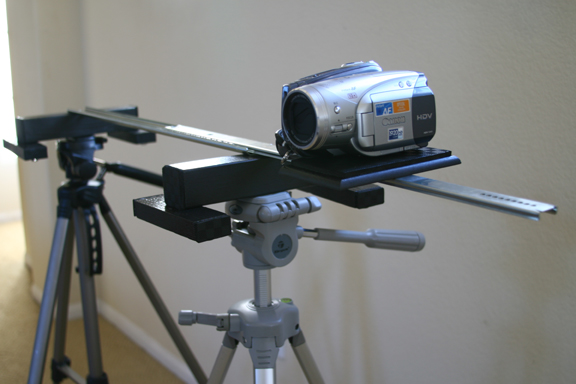
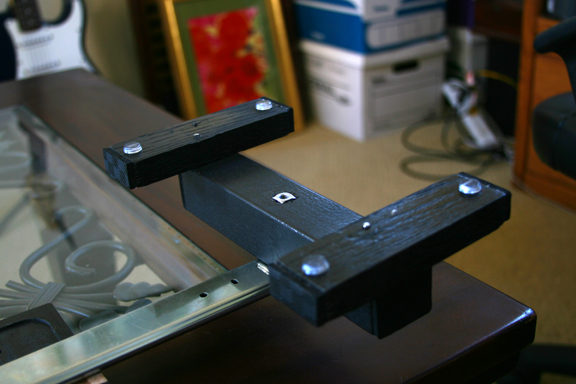
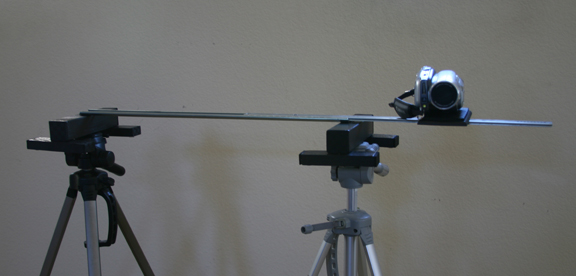
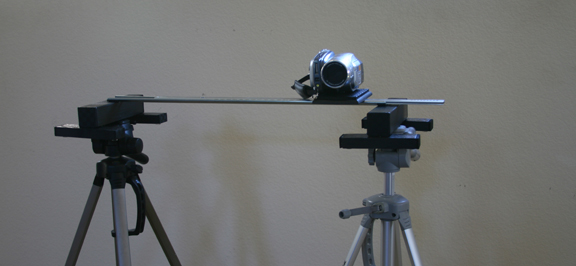
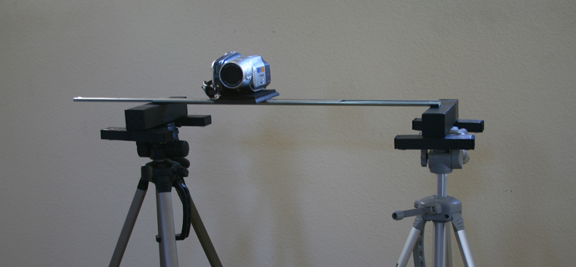
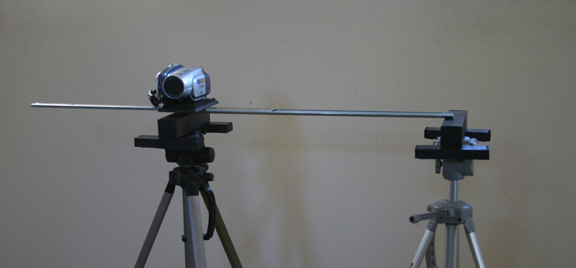
--
Jason
It slides about 30" across so I can get decent usage out of it, and it slides perfectly smooth (with a little help WD-40). I do need room on the sides, it sticks out about 14" on each side. I ended up just mounting it on the existing hole that was closest to the middle because I didn't want to bend the metal drilling a new hole.
It did only stop at one end, so to solve that I bent in the corners in of the side that didn't have a stop and it works fine. I'm planning on mounting a tripod head on it so it'll be a little more effective.
I'll post a link to some footage with it being used as soon as I get a chance.
--
Jason
Last edited:
here is my end stop solution, well 2 different ones and I'm trying to decide which to stick with... thought maybe you guys could voice your opinion on which you prefer.
Went the cheap route -- I think both options cost no more than $5 total each:
rubber washer with a couple regular washers and end bolt (wider end stop):


thicker rubber washer thing with endbolt (narrower/sleeker stopper but just as effective):


Went the cheap route -- I think both options cost no more than $5 total each:
rubber washer with a couple regular washers and end bolt (wider end stop):
thicker rubber washer thing with endbolt (narrower/sleeker stopper but just as effective):


ZazaCast
Major Contributor
I actually have both the designs - the Igus version works well for side to side movement. The drawer rail works where you have to move forward and backward towards the subject.
I don't understand...you can slide or dolly any which way with the ZazSlider?
Why would you need 2 different versions?
ZazaCast
Major Contributor
DITTO. Second one looks better.:thumbsup:The second solution looks more pro to me.

zcream
Well-known member
Hi Zaza. If I move towards the subject, the long Drylin rail comes within view, its seen in the composition.
With the drawer version the camera can be attached to the open end of the drawer and there is nothing in view..
With the drawer version the camera can be attached to the open end of the drawer and there is nothing in view..
I don't understand...you can slide or dolly any which way with the ZazSlider?
Why would you need 2 different versions?
ZazaCast
Major Contributor
Hi Zaza. If I move towards the subject, the long Drylin rail comes within view, its seen in the composition.
With the drawer version the camera can be attached to the open end of the drawer and there is nothing in view..
Is your camera mounted directly on the carriage, on a fluid head on the carriage or on a head on a riser (or hi hat)? If you built it like mine, there's no problem with the rail getting in the way. I dolly ALL the time with mine.:thumbsup:
zcream
Well-known member
Are the baseball bags padded ??
I saw ones that were about 36" - the slider is about 40" and slightly more with the stoppers...
The microphone/speaker stands - I havent found any padded ones..
I saw ones that were about 36" - the slider is about 40" and slightly more with the stoppers...
The microphone/speaker stands - I havent found any padded ones..
Hey I bought a baseball bat bag already, and its a few inches shy....it also has the zipper on the bottom. I was thinking about cutting and sewing an extension to the bag... we'll see.
ZazaCast
Major Contributor
No, not that I've found.Are the baseball bags padded ??
The microphone/speaker stands - I havent found any padded ones..
Checkout the Ultimate Support speaker stand bags....I found a double that is padded.
zcream
Well-known member
I am in Australia so I cannot access them. Another option is a rifle or paintball bag.
So far, bag options.
1. Baseball bat bag (maybe too small)
2. Microphone stand bag
3. Light stand bag
4. Speaker Support Stand bag
5. Rifle bag
6. Paintball bag
Hmm.. Lots to go. If you want one that has space for the slider + tripod and 1-2 heads then its more limited.
Get a Baseball bat bag that fits or a combat/paintball bag.
zcream
Well-known member
It was mounted on a head on top of the carriage. I will rig up an extension and try.
Thanks for the suggestion..
Thanks for the suggestion..
Is your camera mounted directly on the carriage, on a fluid head on the carriage or on a head on a riser (or hi hat)? If you built it like mine, there's no problem with the rail getting in the way. I dolly ALL the time with mine.:thumbsup:
ZazaCast
Major Contributor
5. Rifle bag
BRILLANT! This is probably the BEST idea ever! Why didn't I think of that? I'm heading over the the sports store later...I know I've seen padded rifle bags for like $14.00. GREAT idea!!!! Thank you.:thumbsup:
It was mounted on a head on top of the carriage. I will rig up an extension and try.
Thanks for the suggestion..
Let me know if this work for you too.