Halogens as low cost interview lighting?

GavinGear

Active member
Hey all- I'm needing to do some infrequent interview shots with my 7D.

I'm thinking to use something like a 50mm f1.4 lens, and to shoot the interviews in relatively low light.

I have some shop lights (halogen) that I've made diffusers for, but they tend to make video look rather yellow-ish.

Has anyone had luck with this type of low-cost solution for interview lighting by adjusting the whitebalance with the 7D?

I'd love to have a $1-2K lighting rig but can't justify the cost.

Thanks
 
You can get some very affordable used lighting on ebay or the marketplace...

Just as you said, non-video lighting has a more uneven color spectrum. So you don't get all the colors you need for your sensor. Tungsten is decent and affordable... a lowel tota is like $60 used...
 
What about upgrading shop lights with Lowel-type bulbs? Are they the same size?

I already have stands for flashes, the other option would be to get Lowel Tota heads and use those stands.
 
Sounds like it would work if they fit... my totas take 4 1/2" bulb... here is what B&H lists for the totas...

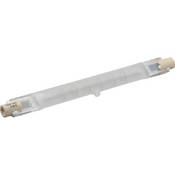
EMD Lamp (750W, 120V)

The Impact EMD Lamp (750W, 120V) is a frosted, double-ended bulb for many light fixtures used in stage, photographic and film applications.
 
I'm a gaffer. I work with nothing but professional movie lights and have essentially no experience with work lights.

I don't see why they wouldn't work fine, though they are harder to control.

Their color spectrum is similar to movie tungsten globes. The difference is that movie lights are balanced to 3200K while worklights are about 2800K, noticeably yellower. No sweat, the 7D can be manually adjusted down to 2500K.

You don't need the Lowel globes, but if you choose to get them for some reason, don't get 750W get 500W -- they are a lot less hot. Do not buy a Tota, I have several and they are no better than your worklights for interviews because they have no built in barndoors or focus. (The Totas have hinged reflectors that look like barndoors but if you try to use them as such you will melt the aluminum reflectors.)

If you're going to buy inexpensive movie lights get a single Lowel Omni at 500W and a Lowel Pro-light 250W focusable with four barndoors.

Look up three and four point interview lighting. Check out some diagrams with a Google image search.

In general, do this. Looking down on the scene from above, subject at top, interviewer at bottom, camera to left of interviewer. Use your Omni or worklight as the key. Put it to the interviewer's right and aim it across the subject's face so that just a little of the light's right side of beam strikes the subject. Put a 2X3 piece of white foamcore on a stand and place that near the subject, out of frame, at camera left. Adjust this bounce fill so that it nicely lights the subject's face and notice that you see more of this side of his face in camera than the key side.*

That will look quite good but you can add a backlight to illuminate the subject's hair and or shoulders to separate them from the background and give a little depth. If you use the little Lowel Pro-light you can "boom it out" somehow and place it high and right behind the subject pointing at him. You might have to flag it out of the lens at the camera.

If you don't have a Pro-light or a boom then just put the backlight in line with the key and subject, just out of frame and use it as a kicker along his cheek and hair or shoulders.

Put the subject as far from the background as you can and use as large an aperture and as long a focal length as you can in order to get shallow depth of field so the background is soft.

You can use a worklight on a homemade dimmer on the back wall as a fourth source to artistically light the background wall, flowers, books, etc., while still keeping it a couple of stops below the subject. You might make your own cucaloris from a piece of black foamcore to break up the background with dappled light.

A picture is worth a thousand of my words, of course.

The big problem you will have with the worklights is that they are harder to control, meaning harder to direct where you want light and harder to flag off where you want shadows and the light beam is not very even. But they will work until you become convinced you should get something better.

Oh crap, I forget. Try to shoot at night or at least turn off all the lights in the room and close the blinds and drapes so that no strongly blue daylight is seeping in. If you will have this problem then get some 1/2 color temperature blue gel and use it to lift the color temperature of your lights to near daylight. Use two sheets on the key and one on the backlight, one or none on the background light. Use the live view or better, a monitor and your aesthetic sense to get a pleasing frame.

Clear as mud?

*I'm trying to keep this simple but in reality, since key light means main source of illumination, in this setup the bounceboard is the key, not the light fixture.
 
Last edited:
Excellent post slondon ! :)
I did use some work light with these. Are they any good ?
 
Last edited:
Excellent post slondon ! :)
I did use some work light with these. Are they any good ?

Yes, those will work okay. They are not 3200K movie globes, they're for household use, of course. Probably 2800K. They also don't burn as hot as higher color temperature bulbs so they last five times as long.

Just be sure to white balance so that white looks white (and skin tones are correct.)

I should have also added that a bit of diffusion gel, maybe Rosco 216 or 250, will help smooth out the light and make it more even across the beam, as well as softening the edges of the shadows it casts -- a much admired look. Lowel uses frosted globes to help avoid the bright spots and uneveness you get from a clear envelope and imperfect reflectors.

If you have too much light it is better to use some neutral density gel to decrease the quantity instead of a dimmer because dimming a lamp lowers its color temperature and you are down near the limits of the camera's ability to compensate.

There are kits for adding barndoors to worklights, I think our sponsor Andrew at Coolights sells them, and they would make using the worklights far easier.

I good eye for lighting is far more important for good results than the fixture you use -- within limits, of course.

---

Hey, just noticed where you are. I loved Helsinki as a brief tourist and my wife's family is from there. We go to all the local Finland society dinners and soak up what bits of culture we can. As for the language, well, you Finns and god can speak it, the rest of us will never be smart enough ;)
 
@slondon ... thx for help. Actually I've found on a catalog that those quartz are 2950K, so not too bad. I have been using baking paper to cover and soften the light. Old rebel trick ;) It worked although I managed to make the lap covering glass exploding. A nice "Boom" in the middle of an interview in a caffe .... you can imagine people wathing me .... and me looking up in the air :) ehehe
Actually I live in helsinki since 13 years but I am from Rome ;) I love this country .... otherwise I would not have resisted so long. Small world .... finns seem to be everywhere :) Where do u live ?
 
Slondon- thanks so much- that post was very helpful!

Anyone have a favorite focal length for interviews (closeup, head + part of upper chest) - assume APS-C (7D)
 
I have been using baking paper to cover and soften the light. Old rebel trick ;)

Yes, baking parchment paper works. Tracing paper is still used for diffusion. You can buy it from Filmtools.

However, go find the local grip and electric rental house and buy a couple of feet of Rosco 250 half full diffusion gel. It's really nice to work with, it's very heat resistant and extremely durable. You can use it for years. You might even be able to score some for free as they get remnants when a truck comes back in from a shoot with the used gels since the gaffer and electrics already had all the leftovers they wanted. Get full, half and opal, if they're giving it away and ask for some CTB in any strength as well.

Don't be bashful, when I first started out I got a lot of usable expendables that way.
 
I'm a gaffer. I work with nothing but professional movie lights and have essentially no experience with work lights.

I don't see why they wouldn't work fine, though they are harder to control.

Their color spectrum is similar to movie tungsten globes. The difference is that movie lights are balanced to 3200K while worklights are about 2800K, noticeably yellower. No sweat, the 7D can be manually adjusted down to 2500K.

You don't need the Lowel globes, but if you choose to get them for some reason, don't get 750W get 500W -- they are a lot less hot. Do not buy a Tota, I have several and they are no better than your worklights for interviews because they have no built in barndoors or focus. (The Totas have hinged reflectors that look like barndoors but if you try to use them as such you will melt the aluminum reflectors.)

If you're going to buy inexpensive movie lights get a single Lowel Omni at 500W and a Lowel Pro-light 250W focusable with four barndoors.

Look up three and four point interview lighting. Check out some diagrams with a Google image search.

In general, do this. Looking down on the scene from above, subject at top, interviewer at bottom, camera to left of interviewer. Use your Omni or worklight as the key. Put it to the interviewer's right and aim it across the subject's face so that just a little of the light's right side of beam strikes the subject. Put a 2X3 piece of white foamcore on a stand and place that near the subject, out of frame, at camera left. Adjust this bounce fill so that it nicely lights the subject's face and notice that you see more of this side of his face in camera than the key side.*

That will look quite good but you can add a backlight to illuminate the subject's hair and or shoulders to separate them from the background and give a little depth. If you use the little Lowel Pro-light you can "boom it out" somehow and place it high and right behind the subject pointing at him. You might have to flag it out of the lens at the camera.

If you don't have a Pro-light or a boom then just put the backlight in line with the key and subject, just out of frame and use it as a kicker along his cheek and hair or shoulders.

Put the subject as far from the background as you can and use as large an aperture and as long a focal length as you can in order to get shallow depth of field so the background is soft.

You can use a worklight on a homemade dimmer on the back wall as a fourth source to artistically light the background wall, flowers, books, etc., while still keeping it a couple of stops below the subject. You might make your own cucaloris from a piece of black foamcore to break up the background with dappled light.

A picture is worth a thousand of my words, of course.

The big problem you will have with the worklights is that they are harder to control, meaning harder to direct where you want light and harder to flag off where you want shadows and the light beam is not very even. But they will work until you become convinced you should get something better.

Oh crap, I forget. Try to shoot at night or at least turn off all the lights in the room and close the blinds and drapes so that no strongly blue daylight is seeping in. If you will have this problem then get some 1/2 color temperature blue gel and use it to lift the color temperature of your lights to near daylight. Use two sheets on the key and one on the backlight, one or none on the background light. Use the live view or better, a monitor and your aesthetic sense to get a pleasing frame.

Clear as mud?

*I'm trying to keep this simple but in reality, since key light means main source of illumination, in this setup the bounceboard is the key, not the light fixture.

Great post with great info FTW!
 
Back
Top