

olof
DVXuser Sponsor
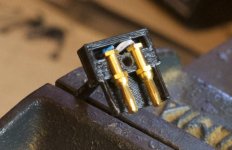
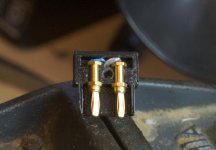
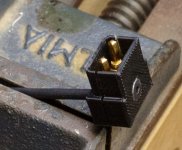
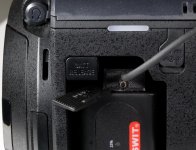
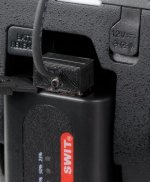
The new Swit 8U63 batteries are great they plug right in to the FS7 no need for the jumper cable. And they have both USB and D-tap ports. However the T-tap placement makes it impossible yo use a Dtap while in the FS7, so I make mini D-tap plugs.
Now bear in mind that the max draw on these batteries is 50w so don't go crazy trying to pull to much power out of them. But it can be a very nice compact solution to use an Odyssey or monitor on your FS7.
Email me if you want the STL files for 3D printing and I will email them back to you. I think sharing STL files is fantastic I love Open Source in general. And 3D printers are fantastic way to share design ideas and get more ideas from others. Long live open source!
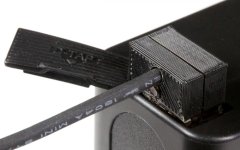
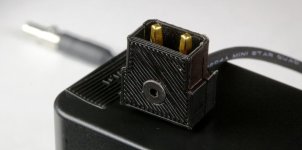
So the STL files are free, after printing you have to tap the hole for the 3mm screw and countersink the other end of the hole and generally file and finish the piece, this is standard with all 3D printed parts. I use the pins from a AB D-tap so you need one of them as well and you then solder them as in the photo, this is very tight, just take your time and do a clean job, no solder globs, just fill the solder cups to the top and insert cable when still liquid, this is the way to be neat. I also recommend filling the inside of the case with plastic resin as you do the final assembly and use 1" piece of heat shrink tube as strain relief, not shown in these photos as this is the prototype just screwed together, you also should enlarge the cable hole to the correct diameter for the cable and heat shrink tube you use.
I am also selling finished cables or just the printed parts on my WEBstore.
http://www.westsideavstore.com/index.php?p=product&id=110
Contact me for more info.
Now bear in mind that the max draw on these batteries is 50w so don't go crazy trying to pull to much power out of them. But it can be a very nice compact solution to use an Odyssey or monitor on your FS7.
Email me if you want the STL files for 3D printing and I will email them back to you. I think sharing STL files is fantastic I love Open Source in general. And 3D printers are fantastic way to share design ideas and get more ideas from others. Long live open source!
So the STL files are free, after printing you have to tap the hole for the 3mm screw and countersink the other end of the hole and generally file and finish the piece, this is standard with all 3D printed parts. I use the pins from a AB D-tap so you need one of them as well and you then solder them as in the photo, this is very tight, just take your time and do a clean job, no solder globs, just fill the solder cups to the top and insert cable when still liquid, this is the way to be neat. I also recommend filling the inside of the case with plastic resin as you do the final assembly and use 1" piece of heat shrink tube as strain relief, not shown in these photos as this is the prototype just screwed together, you also should enlarge the cable hole to the correct diameter for the cable and heat shrink tube you use.
I am also selling finished cables or just the printed parts on my WEBstore.
http://www.westsideavstore.com/index.php?p=product&id=110
Contact me for more info.

