How Do You Do This?

Macphilia

Well-known member
Hi,

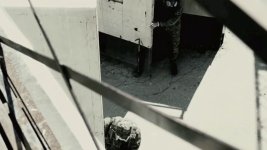
There is a specific look in a new film I'm after. The name of the film is BLINDNESS:

http://www.apple.com/trailers/miramax/blindness/hd/

It's a bleached look with considerable contrast. Any thoughts on recreating this on a DVX100A?

So far, I'm thinking: Chroma Level down (desaturate); Master Ped down (crush blacks); and slight overexposure......

I realize this is a multi-million dollar film shot on film with all kinds of money dumped into post. I simply would like to get close.....:beer:

Any thoughts?

Here are some screen grabs:

 

Attachments

  • Picture 1.jpg
    Picture 1.jpg
    71.5 KB · Views: 0
  • Picture 2.jpg
    Picture 2.jpg
    99.6 KB · Views: 0
  • Picture 3.jpg
    Picture 3.jpg
    80.9 KB · Views: 0
Most of that was not done in-camera.
Alot of it is lighting & Color Correction in post.
You can try different things like Magic Bullet & mess with the levels,
Chroma Level & bring the Master Ped down & open up the iris (like you said) & then do the rest in post.
Magic bullet can really add alot for that look that your trying to get.
give it a try & download a free trial.
 
This process is commonly called bleach bypass. It is typically done all digital now. Search the web for tutorials on bleach bypass.

Here is a simple one from Andrew Krammer using AE.

Get Tutorial
 
It probably has a a lot to do with the consistent black/white set dressing and costuming to really pull off the look.
 
welll, this can be done a couple ways.....

one is to over expose the film, and you an really only replicate this on Film or VERY top end HD, RED, Viper etc....

what you need is the dynamic range of the medium to allow your mid tones to go in to the higher luminance levels....

and its a lighting choice. the contrast levels are low while shooting, very bright all over, and the blacks are regained in post..... This looks like it had a major DI session. Bleach bypass doesnt quite look like that....
 
this is mainly lighting you need very flat lighting. some of the scenes in this were filmed on a mini dv cam there was a mix of milk white paint and water and that was used to reflect the footage off of a laptop and the reflection was filmed
 
My starting point for looks is always to take a look at the American Cinematographer article on the film. Nearly any major film (and many smaller films) that are visually interesting are featured in the magazine. You'll get the full rundown from the cinematographer about how the film was made, from planning to post. Blindness is featured in the September 2008 issue. I read the article, but don't remember the specifics. Still, here are some thoughts.

First, I do not believe they used a bleach bypass for this film. A great deal of this look is achieved through production design, choice of film stock, lighting, and post.

Contrary to your suggestion, there are some good reasons not to overexpose. If you take a look at the stills, the look is very bright, but actually milky. I remember the DP talking about a "sea of milk." It's not pure white, and there is still great detail even in the bright parts. If you overexpose your DVX, you will go to pure white and lose all of your detail. It won't look the same.

If you want a similar look, what I would recommend is this:

PLANNING
You need good production design to keep the envrionment looking neutral and colorless.

IN-CAMERA
Set DETAIL and CORING according to your personal preferences
Set COLOR LEVEL all the way down to begin to achieve some desaturation.
You could conceivably push the COLOR TEMP a little warm, but I'd do it in post
I wouldn't completely crush the blacks in camera, but MP -6 will give you good solid blacks
Use NORM MATRIX to keep the colors under control
Use regular CINELIKE GAMMA
Manually white balance to keep your footage neutral
You might even want to underexpose a bit, just make sure you get all the detail in your highlights

IN POST
If you have Magic Bullet, much of this will be pretty easy:
Raise the gamma until you get the desired lightness
Increase contrast until you have the blacks you want
You may iterate back and forth with gamma and contrast to find just the right look.
Adjust saturation to your taste
Now, the milky part: Using Curves or Levels, adjust the BLUE channel only, sliding the highlights straight down. Basically, instead off values going all the way to 255, you bring them down to the 230's or so. You are just manipulating the individual color channel, because the inverse of BLUE is YELLOW. You can play with it, if it's too yellow, you may want to bring the green highlights down a bit to taste. You may need to adjust curve points in shadows and mids if they get too yellow.

This way, you have all the detail captured, and you're highlights don't go pure white.
 
My bad: I never thanked you for this awesome reply!!! I don't think I ever received it.... Well, thanks again and it has come handy now....

Thanks!
 
Back
Top