FS7: Feedback on grade?

Martin.G

Well-known member
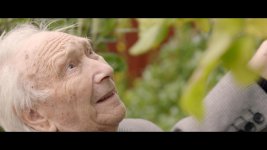
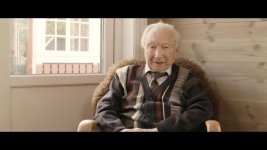
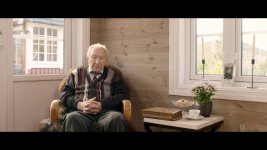
So im trying to learn Resolve, and i have some of the grades under control. However, im not getting satisfied with my work on the interview setting. It could be the base light. It could be the "4K zoom in to HD". It could be my grade. Thats why im asking for feedback.

The footage is shot in CineEI 5500K, using Sigma Art lenses. For grade i used the LC709A with Panasonic gamut as Input LUT for base grade. This looks great in Premiere. The first thing i noticed is that in Resolve its very low contrast. Much lower contrast than in Premiere Pro Lumetri effect. Why is that?


What i am going for is somewhat un-lookish kind of look. I want it to sort of glow warmly. But not that much that it looks like a "look". Just a subtle, warm, comfortable feel. This man lingers for not long in this world, and this film will be the memory his family have of him for years to come.
Untitled 2_1.176.1.POST.jpgUntitled_1.25.1.POST.jpg

The sun kept changing as well during the interview, so both white balance and exposure needs individual adjustments throughout the clips. I see that i missed the spot on my first try, so i intend to clear every grade on the interview scenes, and redo the whole thing. I also think his face, his proof of life, is lacking contrast. Perhaps something like a secondary grade of "Lightroom Clarity" effect is in order? Any tips on getting a warm, subtle glow without going full out "look" is appreciated warmly!


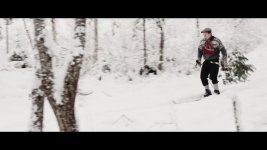
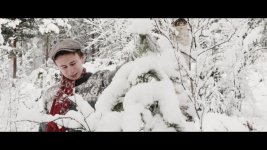
The below stills are from scenes i am happy with. I went for a mild bleach bypass on the 1943 scenes where we are re-enacting his youth, while adding a secondary to the skin tones so they do not look like living dead. While going saturated and contrasty for a healthy look on the 2015 outdoor scenes.
lumberjack 2_1.145.1.jpgLumberjack_1.144.2.jpgOutdoors_1.106.1.POST.jpg

Im loving Resolve more and more for every grade i pull. This is blazing fast, and with quality to boot! Shouldve learned this years ago.
 
I don't know, I thnk the top images are looking pretty good Martin. The 2nd is a little more magenta than the one above it however. Since they are matching shots, I would pay particular attention to keeping those in line. On another note, perhaps the snow scenes are lacking a little detail in the whites as well. Are you sure you want to do bleach bypass there?
 
Last edited:
Martin,

The problem is that the LC709A LUT is designed to work on an slog3.cine clip. If I'm understanding you correctly, you're applying an input LUT prior to the LC709A LUT. What you are essentially doing is moving the footage out of SLOG3. Get rid of the input LUT and try this node configuration:

1) White Balance

2) Exposure

3) LC709A LUT

4) Add or subtract contrast or saturation

5) Power Windows for specific fixes

6) Highlight Recovery
 
Hi Christopher

I am using the LC709A LUT as input lut. It is applied on the whole project. but i think it is way low contrast. Much lower than say, Premiere Pro.

Would you rather skip having it as input lut, and lay it onto the timeline instead?

Do you really white balance and exposure on raw s-log material? Is that not a little hard, all the time theres so little color and exposure to read?
 
I don't know, I thnk the top images are looking pretty good Martin. The 2nd is a little more magenta than the one above it however. Since they are matching shots, I would pay particular attention to keeping those in line. On another note, perhaps the snow scenes are lacking a little detail in the whites as well. Are you sure you want to do bleach bypass there?

Yeah i know. Learned a lot while matching shots and will do all the interview stuff over again so i can do it properly next time. But what tips do you have for increasing detail in the high whites? Theres little detail there no matter how i grade it. In Lightroom i would just clarity the snow out of that area. But i dont know any similar effect in Resolve.
 
Hi Christopher

I am using the LC709A LUT as input lut. It is applied on the whole project. but i think it is way low contrast. Much lower than say, Premiere Pro. Would you rather skip having it as input lut, and lay it onto the timeline instead?

Yes, I never use input LUTs. Putting it in your node tree gives you much more control. I can't speak to the comparison between the LC709A LUT in Resolve and Premiere, as I haven't done much with that LUT or with Premiere. I will say that in addition to some color weirdness, low contrast is one of my biggest complaints about the LC709A LUT. Although in fairness, the LC part of the LUT's name means "Low Contrast".

That being said, the point of having a contrast node following the LUT is to allow you to add contrast to fit your preference.

If you have a long project (most of my work is shorter marketing pieces), you can put the node structure I defined above on the "timeline" node tree rather than the "clip" node tree.

Do you really white balance and exposure on raw s-log material? Is that not a little hard, all the time theres so little color and exposure to read?

As always, it's better to do it in camera, but I will make slight tweaks. Further, if you are going to make adjustments to these two things, it's much better to make them prior to the LUT. My white balance adjustments are typically very slight (to help match between shots). However, if you've over exposed your footage or "exposed to the right", you would want to fix that prior to applying the LUT. With the FS7, you should really never be underexposing and bringing the footage up—that's just asking for noise.

If you're going to do this, don't go overboard. Make small tweaks to the offset knob; don't try to make changes to a specific shadow/mid/highlight unless it is absolutely necessary. Further, setup the node tree and add the LUT before making any changes to color or contrast. You'll be able to see how your changes affect the image in real time.
 
Very nice and well matched. To my eye both images would benefit from pulling down the highlights a bit

Not that I think you need it, but 'clarity' as you know it from lightroom is basically a local midrange contrast adjustment so isoloating the midtones and increasing contrast just in those can help.

If you have raw footage there is a midtone detail setting in the raw panel in resolve.
 
Very nice and well matched. To my eye both images would benefit from pulling down the highlights a bit

Not that I think you need it, but 'clarity' as you know it from lightroom is basically a local midrange contrast adjustment so isoloating the midtones and increasing contrast just in those can help.

If you have raw footage there is a midtone detail setting in the raw panel in resolve.

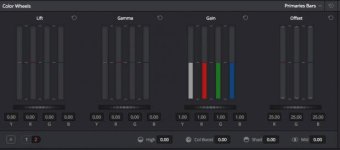
In Resolve 12, the Midtone Detail setting does not require RAW footage and has moved. In the bottom bar of the "Color Wheels" section, there is a "1 | 2" option. On bar 2, you'll see a box labeled "Mid" this is the new midtone adjustment.
Screen Shot 2015-12-09 at 8.42.32 AM.jpg
 
christopher-

i find your responses very helpful.

thank you for adding to this thread.

are you also on bmcuser?

i ask becuz i also look for help with resolve on that site.

again, thanks for sharing.

be well.

rob
smalltalk.media/nyc
 
Thanks all for contributing.

The mid tone slider got me some of the way.
Keying the high luma got me contrast in the snow.
And using the offset wheel instead of 3 way wheels to adjust exposure and white balance was so much easier! Im sure you get more control by doing it indivually. But for speed Offset was great!
 
Back
Top