bgundu
Veteran
http://blog.p2pro.com/post/2135121533/af100-impressions-in-real-world-production
AF100 Impressions in Real World Production
Last weekend I had the opportunity to shoot with nearly finished Panasonic AF100 camera. Panasonic calls this a PL sample, the nearly finished and ready for mass production version.
The shoot was a series of holiday promo’s for the PBS/Sprout channel. We originally considered the Canon 5D for this shoot, due to time and budget constraints. I was hesitant to use the 5D for “on air” spots because of the technical problems like moire, aliasing, and judder.
The new plan was to use the HPX500 with a Pro35 adapter, and bring in some additional lighting and crew.
Luckily for me, Jan Crittenden was able to find an AF100 for me to use for the weekend.
Since the setups were fast and furious, and I did not have an AC on the crew, we decided to shoot with a combination of zoom and prime lenses. From Abel Cinetech in NYC, we rented a HotRod PL adapter, and an Angenieux 15-40 Optimo zoom and a 65mm Zeiss Super Speed prime. I also had the Lumix 14-140 zoom that came in my camera kit from Panasonic.
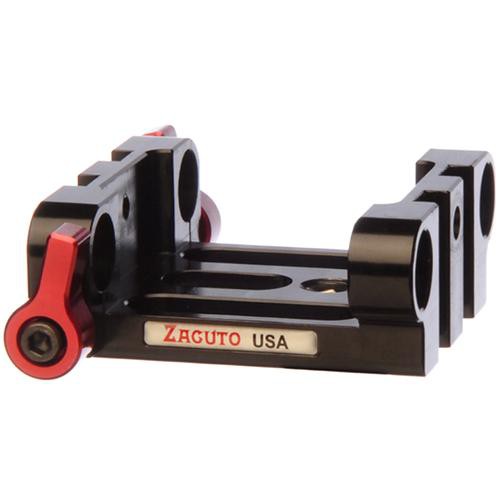
The Optimo is a big heavy zoom, and needed lens support. After a series of trials, the setup that worked the best was the Vocas DSLR riser in conjunction with a Red Rock Micro cheese plate and a Zacuto Zian lens support bracket. I also used a Red Rock Micro matte box in front since it had vertical adjustment unlike my Chrosziel.
Shooting with the AF100 was slightly different than a P2 camera in that the menu structure is different. Menus are easier to read, and more logically placed (imo).
I had an BT-LH80 monitor on the camera for focus and picture, and I used an BT-LH1700 for a client monitor. The LH80 I drove off the SDI output, and I used the HDMI output with an AJA HDMI-SDI converter to drive the 1700. The Video Out OSD works on all outputs via a menu setting.
We shot all the footage at 1080p24 at ISO800. Most images were clean in lit areas, with some grain in the shadows of dimly lit scenes. The grain was not objectionable.
The Optimo is fast for a zoom, at f2.6 all the way through, and looked great. Focus was not as shallow as I had hoped for some shots. The Zeiss Super Speeds are rated at f1.3 and looked great on the AF100, with lots of shallow focus when wide open.
The Lumix lens did not compare well to the Zeiss or Optimo lenses, as one would expect. The 14-140 is rated at f4 at the wide end, and slows to f5.8 at the long end.
Camera balance is going to be a challenge with heavy glass because the camera is so light. I am not sure what rig I will need to make this work with a variety of lenses. Maybe the new HotRod Cameras kit will work best.
I shot on 2 San Disk 8GB class 6 cards, which yielded about 45 minutes each, and one Panasonic 16GB class 10 card, which was good for about 100 minutes of recording in PH mode.
The footage was converted to ProRes LT in Final Cut Pro via the Log and Transfer. I would like to see more support for metadata in AVCCam in FCP. Actual, ANY support of metadata would be nice, as there is NO ACCCam metadata supported now.
There are a few things that I hope to see in a future version of the AF100, like dual HD-SDI outputs, and on board power, to drive a monitor. Neither of these are deal breakers, since there are work-arounds for both.