

TheDynamoDuo
Member
Hey guys, I did a 5-step tutorial on how to make a shoulder mount for the Canon 7D (Also this works for just about ANY prosumer camera, but you may need to adjust a few dimensions of the PVC pipe depending on the size of your gear) and figured I'd post it here in case anyone else was in need of a "run'n'gun" solution but doesn't want to pay the $700 most online retailers charge. This setup costs about $20-25. If you like this tutorial check out the blog over @ TheDynamoDuo.com for more like it and more to come! I definitely appreciate any feedback too, guys!
First you are going to need the following, also the size of the PVC is all dependent on User Preference. Go with what feels like its going to be comfortable to hold for extended periods of time. I recommend the 1/2", 3/4" or 1" dimensions:
!IMPORTANT! - Make sure you get the Elbows and "T's" in matching size to the PVC pipe size you pick! If in doubt, test it at the hardware store to make sure they'll fit together before purchasing them.
1. 6 ft. PVC Pipe
2. PVC Cap or Plug (dependent on preference, I prefer Caps personally)
3. PVC Glue
4. 90° Plumbing PVC Elbow
5. 90° Electric PVC Elbow
6. 45° Plumbing PVC Elbow X2
7. 1 ½" - 1/4" Bolt
8. 1/4" Washer X2
9. 1/4" Hex Nut
10. 1/4" Wing Nut
11. 1" - 1/4" Fender Washer
12. Spray Paint color of your choice
13. Bicycle Handle Grips
Alright, so you've purchased all the supplies, now you're ready to build this sucker!
Step 1 - Cut the PVC pipe into the following increments:
Two - 3" segments
One - 5", 6" and 7" segments
Step 2 - Drill a 1/4" hole in the top center of the PVC "T". Put the Bolt through the hole upward with the washer on it, of course. Fasten it on with the nut and other washer on the top side, holding it in place. Now, you should have the T with a bolt through it, screw on the wing nut with the wings facing DOWNWARD in the direction of the T.
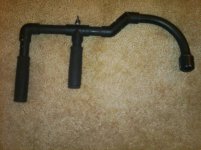
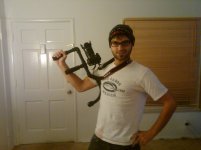
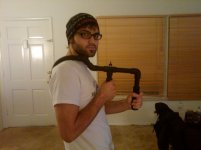
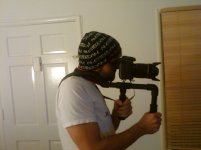
Step 3 - Assemble the pieces, so they look like the pictures I posted here. The cap/plug goes on the butt of the electric PVC shoulder piece. Once assembled, put it on your shoulder and get a feel for it. For example, I offset my shoulder segment by a few degrees because it felt slightly more natural and comfortable to hold. DO NOT PUT ON YOUR CAMERA YET! If everything feels comfortable and how you like it, go ahead and use the PVC glue to make it permanent! If it doesn't trim the PVC further to your liking.
Step 4 - Spray paint the mount. Allow ample time to dry.
Step 5 - Wet the bicycle handle grips with water, so they loosen up and then slide them over the PVC pipe handles you've created. Depending on the size of PVC pipe you got, this may be stubborn but be patient, you can get them on.
VOILA! You now have a complete shoulder mount for your prosumer camera! Enjoy! If you're stuck be sure to check the pictures and if you have any questions whatsoever don't hesitate to ask. Oh and a shout out to the guys over at Quantum Petshop for the original design idea!
If you like this check out @ TheDynamoDuo.com for more
I was thinking about doing a 7D slo-mo tutorial, what do you guys think?
Attachments
Last edited:
