Transporting Your Gear

At some point we all have to move gear about. Whether from one end of the studio to the other, driving to a location, or even flying to foreign lands.

Well the whole point of this thread is to address… How to get your kit from point A to point B.

It doesn't matter whether you carry your gear in the trunk of your car, or haul it about in a 10-ton truck. This thread is for you to post your own personal experience with transporting gear, so that others can learn what works, and what doesn't. I invite you to post pics of organizers, transport cases, carts, vehicles, and anything that makes transporting, and or storing your kit easier and more manageable.
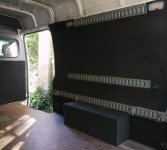
 
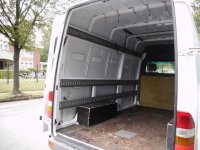
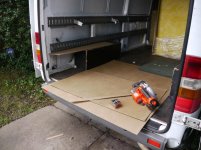
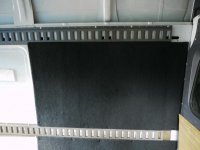
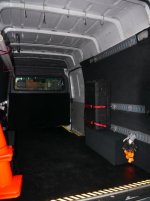
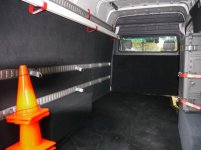
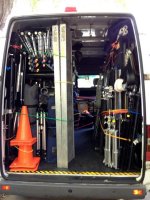
I'll start by saying I have changed the way I transport my kit a number of times over the years. From audio bags in the back of a Chevy Vega early on, to a Range Rover with a shooting platform on top during the housing boom, to a 5-Ton grip truck. In a pinch I even loaded up a Ferrari with what we could carry to shoot a series of political ads. My current vehicle of choice for transporting my gear is a 2005 Mercedes Sprinter van, which I purchased used in 2009. In the 5 years I have had the Sprinter, I have changed the configuration a number of times to suit the work at hand. The very first thing I did to make transporting my gear more manageable, was to add E-Track to the cargo area so I could secure my kit without it flopping about. The second, was to build and install wall panels to keep the walls of the van from getting all dinged up.
 

Attachments

  • P1000234.jpg
    P1000234.jpg
    62.9 KB · Views: 0
  • sprinter 01.jpg
    sprinter 01.jpg
    94.5 KB · Views: 0
  • sprinter 08.jpg
    sprinter 08.jpg
    94.5 KB · Views: 0
  • sprinter 09.jpg
    sprinter 09.jpg
    63.3 KB · Views: 0
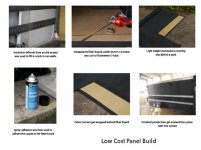
Here is a little breakdown of how I did it on a very small budget.
The most expensive item was the covering purchased from an automotive fabric outlet.
 

Attachments

  • Sprinter.jpg
    Sprinter.jpg
    38.9 KB · Views: 0
Here are a couple of shots of the finished walls, and bed liner sprayed on the floor.
 

Attachments

  • Shelving for upper E-Track .jpg
    Shelving for upper E-Track .jpg
    31.9 KB · Views: 0
  • Inside.jpg
    Inside.jpg
    35.3 KB · Views: 0
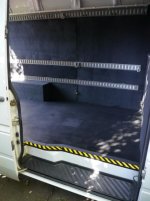
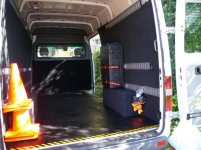
The next thing I did after falling out of the van, was to add caution tape on the floor to mark where the end of the world was so nobody would get hurt falling out.
 

Attachments

  • sprinter side.jpg
    sprinter side.jpg
    36.8 KB · Views: 0
  • sprinter rear.jpg
    sprinter rear.jpg
    46.7 KB · Views: 0
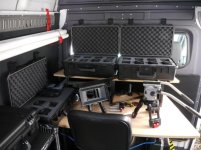
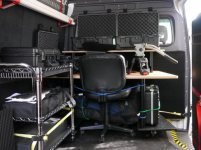
Early on I had a work bench area in the van where I could build out cameras, DIT station, or mix audio, and I kept all my gear on inexpensive carts so I could roll everything out. But I soon learned that having a van where you could clear out all your gear at a moments notice, meant that everyone and their brother wanted to use the van for moving furniture and the like on the weekend, and boy did that get old fast.
 

Attachments

  • Work Area 01.jpg
    Work Area 01.jpg
    45.2 KB · Views: 0
  • Work Area 03.jpg
    Work Area 03.jpg
    46.1 KB · Views: 0
  • cover 01.jpg
    cover 01.jpg
    46.3 KB · Views: 0
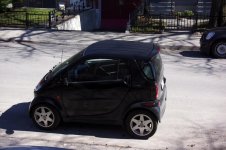
Nice setup David! A far cry from mine. I have down scaled from a Windstar to a SmartCar. It is a Mercedes however :>)
 
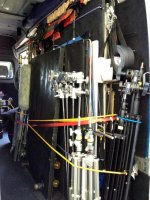
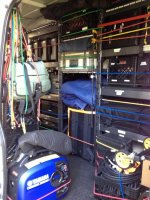
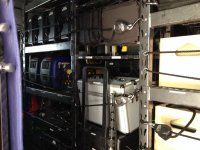
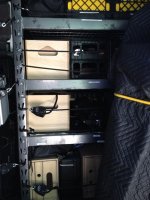
So I decided to install shelving on one side of the van, and build an area on the other side to store flags scrims silks and the like.
 

Attachments

  • Rear B.jpg
    Rear B.jpg
    79 KB · Views: 0
  • Rear A.jpg
    Rear A.jpg
    73.2 KB · Views: 0
  • Racks A.jpg
    Racks A.jpg
    84.2 KB · Views: 0
While my gear configuration has changed over time since the previous pics above, I have kept the shelving racks in place.

One of the safest additions, was removing the majority of the bungee cords which secured the gear in the racks, and replaced them with rope ratchets. I believe it was Matt Gottshalk that suggested them, and since installing the rope ratchets, I have suffered no near eye loosing incidents.
 

Attachments

  • rope ratchets.jpg
    rope ratchets.jpg
    101.9 KB · Views: 0
  • Joker Boxes.jpg
    Joker Boxes.jpg
    62.9 KB · Views: 0
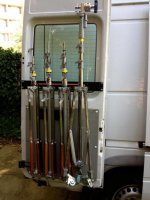
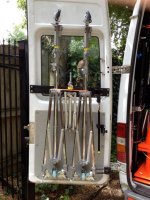
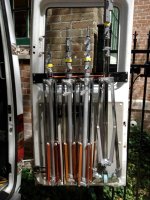
Something else which has helped with available space in the van, was to install door racks to hold stands.
 

Attachments

  • Door A.jpg
    Door A.jpg
    58 KB · Views: 0
  • Door Left.jpg
    Door Left.jpg
    76.2 KB · Views: 0
  • Door Right.jpg
    Door Right.jpg
    82.7 KB · Views: 0
Here's my advice on cases - get really good at eBay search.

Try "military cases", and also Hardigg, SKB, Tenba and Pelican. Also do local searches, since cases can be pricey to ship. And if someone ships a roller case to you, ask them if they can remove the wheels and pack them in the case.

Use Craigs List to find cases as well. There's usually a ton of anvil-style cases sold by musicians, but I avoid those due to weight. But surplus military stuff shows up often.

Any time you travel to a big city in your vehicle, check ahead for cases; check military surplus stores, etc. There's a lot of military plastic (Hardigg, Pelican) with the foam torn out.

Learn to use a pop riveter (about $12) and you can fix broken cases and modify them. It's pretty easy to create inserts and dividers with 1/8 plywood (luan) and hot glue padding and fabric to the dividers... or pad an interior where it will take standard fabric velcro dividers.

If you can use a router, you can make frames with slots for 1/8 ply and make a really solid, adjustable divider setup.

Check at the fabric store in your town - they usually have a list of ladies who sew curtains and stuff - you can make your own padded velcro dividers (and custom scrim jim fabrics, rags, space lights, etc) for pennies compared to manufactured stuff.

There are often great Tenba cases where a pocket or strap is torn. These can be easily fixed at a tailor shop, usually they can patch them with ballistic nylon and heavy thread. Tenba cases are pretty badass for weight vs. strength.

Yoga mat material makes great bottom padding, use several layers.

Cases make me feel very very good... nice to slowly delegate the dairy crates to the garage!
 
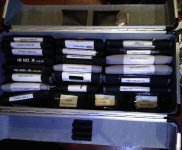
On the subject of cases, as many of you know, I am a wee bit frugal, and sometimes the thought of spending big money on things which shouldn't cost a bundle turns me off. Case in point, I was looking for a hard case to carry my filters in, and was getting quotes of over $300 for a custom case. So after a quick visit to Harbor Freight I purchased this…. http://www.harborfreight.com/17-in-x-12-in-x-5-in-aluminum-tool-case-69317.html

While not perfect, it was a $40 solution for transporting filters in my van.
 

Attachments

  • Filters.jpg
    Filters.jpg
    97.9 KB · Views: 0
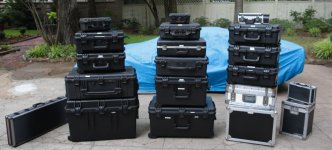
As Michael mentions, cases are a great way to protect your gear during transport. But choosing the proper size case which fits your method of transportation can be a challenge at times. I know plenty of shooters who work in NY city for example take the subway. I would love those of you who take alternate methods of travel to weigh in with what works best in your situation.
 

Attachments

  • Jones Cases.jpg
    Jones Cases.jpg
    67.4 KB · Views: 1
Last edited:
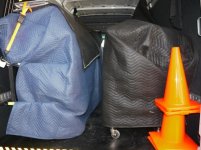
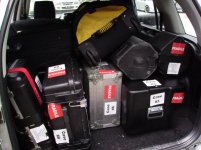
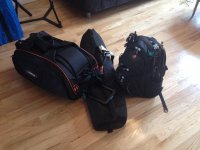
These cases mostly Pelican and a couple of custom Clydesdale style ones made for me in Vancouver kept my gear safe flying cargo to the Caribbean and the Arctic. Over the past two years I downsized and moved to rentals when needed as more and more people hang out their shingle as lighting camera persons. Less work for larger teams up here and more one man bands. The three bags and Smart Car are my one man band kit, I keep a Passat Wagon for larger equipment needs and renovations. I think it depends what the market needs in your location.
 

Attachments

  • BarbadosTrk1s.jpg
    BarbadosTrk1s.jpg
    63.8 KB · Views: 0
  • photo.jpg
    photo.jpg
    80.5 KB · Views: 0
  • DSC00906.jpg
    DSC00906.jpg
    95.3 KB · Views: 0
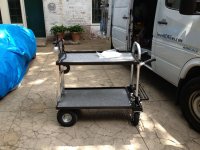
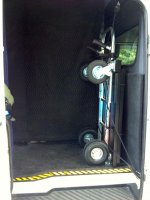
Something else that has helped me move my gear once on location, is a FilmTools camera assistant cart.

The Junior size fits in elevators, and breaks down to take up less room.
 

Attachments

  • FilmTools Cart.jpg
    FilmTools Cart.jpg
    110.9 KB · Views: 0
  • FilmTools Cart 2.jpg
    FilmTools Cart 2.jpg
    59.7 KB · Views: 0
I have to vote for Really Useful Boxes.

Usually the 64 litres size. But not (really) tough enough for air travel or loading in a large lorry

Cheaper lighter and better stacking than Pelis.

A thing that really sucks about Pelis is the inability to pick up two in one hand!


--

One thing.. seen above.. think about crashing/rolling your vehicle.

Cars+Kit are a disaster zone - you dont want kit joining you up front it will take your head off - in a car? strap it down.

Im lucky to have a Boxer van with full metal bulkhead.

S
 
There's nothing a wee bit frugal about that cart.

Great thread. Very smart setup. Thanks for sharing. :thumbsup:

Something else that has helped me move my gear once on location, is a FilmTools camera assistant cart.

The Junior size fits in elevators, and breaks down to take up less room.
 
Back
Top