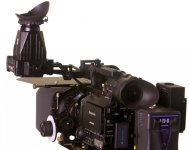
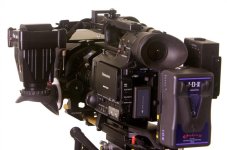
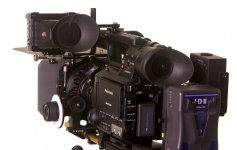
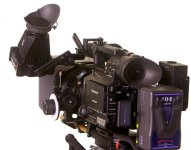
New EVF Bracket from Westside AV

Bern Caughey

Veteran
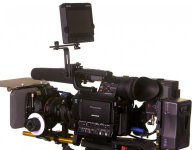
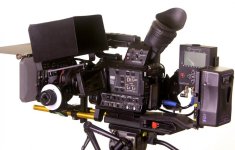
I received Westside AV's new EVF bracket earlier this week, but only got around to mounting it this morning.

http://www.westsideavstore.com/index.php?p=product&id=56

While I haven't used it in anger yet, first impressions are very positive. It's compact, lightweight, & strong.

The EVF can be rotated quickly along the vertical axis with one hand, & unlike my previous setup where it was hung upside down with a Noga Arm, the EVF's buttons are now easily accessed.

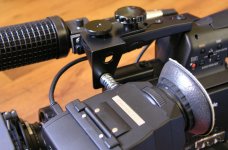
Only issue I have is when used in conjunction with Letus' PL Mount. This PL mount has a unique feature that attaches to the AF100 handle, but has a raised lip that interferes with tightening the EVF bracket into the cold shoe.

http://www.letusdirect.com/cart/mft-43-pl-mount.html

I rarely use PL's when pulling my own focus due to the long trow, so removed the Letus' for now, & will figure another way to mount the bracket when need be.

Overall Olof's bracket is a welcome addition, & I rate it highly.

More information, & photos, can be found in the following post, but it's buried in a thread about shoulder rigs, & I feel this topic deserves it's own.

http://www.dvxuser.com/V6/showthrea...our-thoughts&p=2491217&highlight=#post2491217

Lastly I'd like to thank Ed Kishel one more time for pointing me to coiled HDMI cables. Fully coiled they're about 12" long, but can be stretched at least twice that, & work great with Olof's bracket. The cable is well made, & the connectors are less prone to disconnect compared to the 18" straight cables I previously used.

http://www.blackbox.com/Store/Detail.aspx/HDMI-Coiled-Cable-Male-Male-1-m-3-2-ft/EVHDMI05Ă001M

Best,
Bern
 
Last edited:
I have the bracket on the way. Had a shoot last week that required a lot of low angles and shooting up cradling the camera from the chest. My EVF on the Noga arm was hard as hell to adjust when not shooting off the shoulder. The bracket is hopefully going to solve that issue.

The coiled HDMI cable is very cool. If the made it with a swivel head it would be perfect!
 
Last edited:
Only issue I have is when used in conjunction with Letus' PL Mount. This PL mount has a unique feature that attaches to the AF100 handle, but has a raised lip that interferes with tightening the EVF bracket into the cold shoe.

Bern, if you let me know what I have to do to make the PL mount work. I will make a new part for you. I assume the top angle bracket would have to be longer (further out from the AF100 body).

I will be happy to send you a new part, and make it an option for everyone. I now also offer the option of a shoe mount on top of the the bracket, so you don't loose that as a mount point for lights etc.
 
Having a quick look at the pics of Olof's latest creation - there doesn't seem to be a tilt adjust for the viewfinder. You can swing it back and forth but if you do that can you then tilt the finder up or down?

I've got two of the wood handles and Nano brackets from Westside and are more than happy with those.

The Bracket can be used in many different possitions. It can be tilted, moved back and forth, swiveled, raised, lowered, inverted for very high position, moved closer and further from the camera.

It works with EVF's and small monitors. The nice thing is it stays level with the horizon, if you keep it pointed straight back

Here are some photos that may help:

EVFpos1.jpg EVFpos2.jpg EVFpos3.jpg

EVFpos4.jpg EVFpos5.jpg EVFpos6.jpg

The last photo shows the bracket used to hold a 5" monitor just above the LCD, this is nice if you like to have the scopes and all the info on the LCD but still have a full monitor, that also is hooked to the NanoFlash in this setup for confidence.
 
Last edited:
Olof,

Is that a prototype of your AF100 shoulder pad, or the existing version for the Canon?

If it is the AF's do you know how far back it extends from the camera? Also how thick it is without the rail attachment, but with the quick release plate? I'd love to figure out if I can squeeze into my travel case without disassembly.

Best,
Bern
 
Last edited:
Very nice bracket, have you thought of making one that attaches to the cameras 1/4 20 or 3/8th threads? Obviously the shoe is further forward but ive watched the AFs shoe snap on a friends camera.
 
Olof,

Is that a prototype of your AF100 shoulder pad, or the existing version for the Canon?

If it is the AF's do you know how far back it extends from the camera? Also how thick it is without the rail attachment, but with the quick release plate? I'd love to figure out if I can squeeze into my travel case without disassembly.

Best,
Bern

Bern, that is the 300/305 Canon shipping version (it has a special shape to fit the bottom of that camera and to allow access to batteries), I was just trying it out on the AF100, it is not bad, but I want to make the AF100 version shoulder further forward, and shaped more. It is in the works, very close. I keep refining it. The AF100 is my main camera these days, as I use it I keep improving the rig. Small changes make a big difference.

The rig as shown in the above photos is 1/2" thick, including the VCT14 wedge up front. Adding the rails adds another 3/8" to the thickness above the liquid head, I am trying to keep this very thin to balance the rig better on the head. But this only works if you use a VCT-14 or similar QR system, not with sliding dovetail systems like Miller or Manfrotto etc. unless you also add a TA-100 or VCT-14 plate as well. I use the TA-100 on most of my Miller heads and VCT-14 on a few where I want the additional weight, like on my Stedicam and jib.

This version sticks out 6" behind the AF100. But that is customizable very easily. The final AF100 version may be adjustable or quick removable (adjustable and removable is probably best), so that you can slide the back closer to the camera to fit in a bag and then back to make room for cables, battery changes and for balance of course.

Do you have a specific amount of room you need to fit in the bag? Let me know and I will see if I can make that work.

I am trying to make this kit very light, rugged and compact and balanced of course. I am also trying to keep the price reasonable.
 
Very nice bracket, have you thought of making one that attaches to the cameras 1/4 20 or 3/8th threads? Obviously the shoe is further forward but ive watched the AFs shoe snap on a friends camera.

Joe, I have thought about it, it would be a little heavier. But I can certainly do it.

I have seen some pretty ridiculous kits added to shoe mounts. And you are right, you want to be careful about not putting to much weight or torque on a shoe mount. I think the AF100 shoe mount is one of the more rugged ones out there, some are just attached to plastic, I worry more about them.

You can also use my EVF bracket mounted to the shoe mount that is exposed when you remove the handle on the AF100, you just invert the top part. It would also be possible to use the 1/4-20 threaded hole left up front when removing the handle.

Do you think there would be a demand for a replacement handle and "cheese plate" (to allow for accessories) combo with an optional evf holder? I have pondered this. I have requests for this for the F3. But I kind of like the AF100 top handle, it seems pretty rugged and easy to replace/repair.
 
Olof: One thing that is significantly better about your mounting the finder on the handle is that it keeps the area around the front of the camera clear so your fingers can do white balances and iris adjustments. I would recommend that the top plate be wider to accommodate both the shoe and the 14/20.. That's what I've done and it's very secure (I just make these things for my own cameras). As for the cheese plate integrated with a replacement handle, that's a tough call. I don't know how many you need to sell to make it worth your while, but the bloom seems to be off the AF100 rose these days.
 

Attachments

  • Finder.jpg
    Finder.jpg
    95 KB · Views: 0
Last edited:
Olof: One thing that is significantly better about your mounting the finder on the handle is that it keeps the area around the front of the camera clear so your fingers can do white balances and iris adjustments. I would recommend that the top plate be wider to accommodate both the shoe and the 14/20.. That's what I've done and it's very secure (I just make these things for my own cameras). As for the cheese plate integrated with a replacement handle, that's a tough call. I don't know how many you need to sell to make it worth your while, but the bloom seems to be off the AF100 rose these days.

Mac, that is a very nice design. Do you mind if I make a version of it? I could call it the "Mac Mod 100".

I will make it as an AF-100 specific bracket, it will not work on a lot of other cams. To make it universal it would have to be much larger and complex some handles are curved. Though I can envision a "clamp" around the handle that may be universal.

I would also include a shoe mount on top of it so you get that for versatility as well.

I will post an update here, when the new version is ready, and any early adapters will be able to upgrade at a very special price. I will still carry both versions of the top part, that way you can use it on many different cams.
 
Have at it Olof - I like your work... By the way, I originally used a compression spring to provide tension for the rotation of the EVF.. I've since discovered that the weight isn't enough to warrant it, so I'm just using a 1" nylon spacer with nylon washers to relieve friction.. Also, that Cineroid died so now I'm using a Z-Finder, which has the mounting hole in a different place.

I also use this on the HPX250 (with an extension bracket for the 1/4-20s)... there may be some interest there for you as well.
 
Mac, thanks I will post photos here soon.

The way I solve the friction no slip problem is, socket bolt with wings (plastic press fit), then a stainless bell washer, then a nylon washer, then through first bracket unthreaded, then another nylon washer, then into a threaded hole in the second bracket.

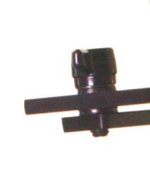
I use 1/4-20 socket bolts with friction patch, I have found this is very compact and sturdy, and the bolt does not loosen as you make adjustments. You can adjust the amount of friction easily with the winged bolt.

Here is an enlarged view of this friction setup:
closeup.jpg
 
Olof: You're obviously way more sophisticated than I am - my efforts are limited to simple hand tools and whatever I can find at my small-town hardware store. I like that challenge, obviously, but I always appreciate elegant solutions to problems...
 
Olof,

Next up: Canon C300. Similar to AF100 dimensions - hoping you'll be able to get a hold of one.
 
Back
Top