My own attempt at a DIY Mattebox

ZippZiggy

Member
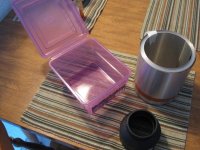
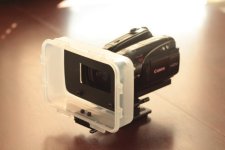
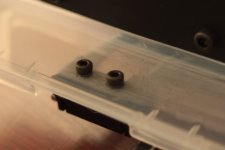
So im going to attempt to build a DIY mattebox similar to teddybears mattebox. For the flags im going to be using teddybears patterns for some inspiration with a few modifications. I found all these peices at ace hardware, the pictures shows the parts ill be using. the aluminum flashing will be used for the flags, the black piping fits perfectly over my lense and that will be attached to the back of the plastic container. Will post pics as I go.

Hopefully the pics will show up in my post, if not clicking on the link should open them.

Total cost ($29.71) Right on target for my budget of 30$.:)

Post as a i go.
 

Attachments

  • IMG_1017.jpg
    IMG_1017.jpg
    116.8 KB · Views: 0
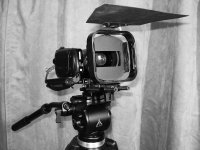
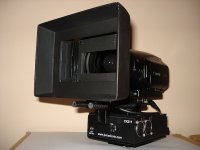
I made an emergency matte box last week - I had a new one on order and a weekend gig came up. Slapped this together with plywood in an afternoon, shot all weekend... and my "real" box showed up monday.

This worked fine though, it has two felt-lined 4x4 filter slots (they don't rotate).

I'll probably stick a post on here somewhere and give it to someone who needs it. It's ghetto but does the job. The velcro holds a sheet of black vinyl to block light at the back. I saw a few reflections in my polarizer, so I just tossed a dark cloth (from my 4x5 days) over it.

hood1.jpg
 
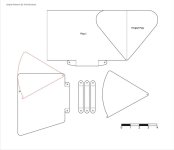
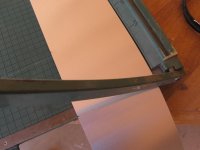
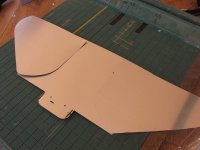
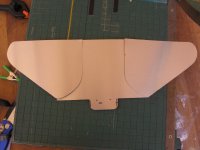
Heres some progress...spent some time today working with the aluminum material, its nice stuff to work with becaus you can cut it easily with a paper cutter.I also found it is alot easier to get perfectly straight lines if you use a straight edge and score the line with a sharp knife, then using a pair of scissors, cut down that line and it separates perfect and you end up with a straight cut. Anyhoo, here is my first attempts. I modified teddybears templates a bit, but im still not sure if its the design I want to go with.

Also another thing I found is that the material itself is a little on the unrigid side. Now when its cut down into smaller pieces its just fine, but as far as the top flag which is a little longer, it can easily be fixed by adding a small bend down the middle of the piece. even though its a small adjustment, it makes it very strong.
 

Attachments

  • MyTemplates.jpg
    MyTemplates.jpg
    38.2 KB · Views: 0
  • IMG_1023.jpg
    IMG_1023.jpg
    57.2 KB · Views: 0
  • IMG_1024.jpg
    IMG_1024.jpg
    61.7 KB · Views: 0
  • IMG_1025.jpg
    IMG_1025.jpg
    63.1 KB · Views: 0
Thankls. Im having fun with this stuff. Yea I agree with you on the thickness part...its flashing aluminum, the stuff you use on houses so its a little thicker (not by much) then the regular sheets of aluminum. I was thinking of going with metal sheets, the zinc plated stuff, but its relatively heavy, and in order to make good straight bends, i heard you would need some sort of a bending brake. I may still have to resort to that, but ill keep ya updated on anything I figure out. Gonna spend a little time working on it this afternoon. Will post the progress:)
 
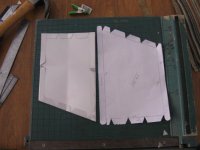
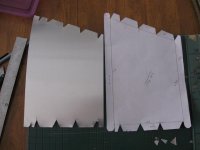
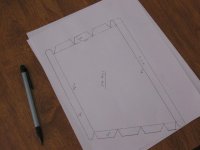
Heres a little update. As twocik23 said, the aluminum can get pretty sharp, so i have been trying to think of a way to dull the edges a little and I came up with bending the edges over, kinda like making paper models. This makes the piece much stronger, as well as adding greatly to the overall rigidity. I drew up a pattern, as you can see in the pictures and left small tabs to fold over on all the edges. then I lightly glue sticked it to my peice of aluminum and cut it out. Here are my results. This was a test piece so its got a few mistakes in it...but it kinda shows what im talking about. its just about as strong as a peice of sheet metal now, but a bit lighter, which will really add up in the end.

Next task, build my hinging mechanism into the flags. Gonna try to work on it a little bit tonight. Will post any progess I make.
 

Attachments

  • IMG_1029.jpg
    IMG_1029.jpg
    60.7 KB · Views: 0
  • IMG_1028.jpg
    IMG_1028.jpg
    55.7 KB · Views: 0
  • IMG_1026.jpg
    IMG_1026.jpg
    54.3 KB · Views: 0
try using a sander on the edges, and round them down. add some matte black spray paint and you should be good to go.
 
DIY cokin mattebox

DIY cokin mattebox

My version:
 

Attachments

  • HV40 - Cokin MatteBox_03.jpg
    HV40 - Cokin MatteBox_03.jpg
    81.1 KB · Views: 0
did you mold that matte box yourself? it looks perfect for what i need. I use a cokin filter holder with cokin filters constantly and have been looking for a nice matte box to go with it.
 
did you mold that matte box yourself?
Yeah, I've glued the plastic container on the Cokin hood, then I've applied some fiberglass on it to give the shape. Sand a bit and painted it black. A bit of trouble, but looks nice. The newer version I'm working on will be simpler, and will look just as good.
Yeah, nice one! I think that matte box looks pretty darn good!
Thanks for the comments! I'll post the pics of the new one, which looks just as mad! Ahh, some DIY work...again! (to save some hundreds of $)
 
Here's what I've been workin on recently. Not finished, not painted, but you'll get the idea:

IMG_5736.JPGIMG_5731.JPGIMG_5734.JPGIMG_5735.JPG

I still have to add the flags on top and sides, then I'll have something quite complete. And before someone ask, I don't use filter. I may want to build something that would be accepting some, but right now I just don't need it, so I've kept it simple in it's design.
 
Back
Top