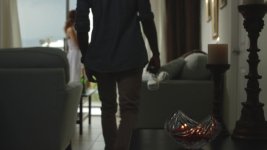
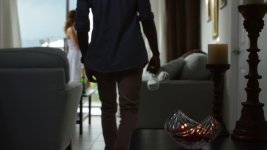
Lighting a "Dark" Scene and filming with a DSLR?

ReelFilmGeek

Well-known member
SO I was wondering if I could get some tips on lighting dark scenes and how far should I push it when filming with a DSLR. Like how many stops under exposed will you let a scene get underexposed before you think you are pushing the camera's capabilities? Also do you guys light your scenes brighter and just darken in post?
 
... do you guys light your scenes brighter and just darken in post?

That's what I do, yes.

Given that we can make scenes as dark as we want in post, it seems silly to me to sacrifice shadow detail and color during capture buy light starving the sensor(s). And it certainly seems like a bad idea to bring up noise levels. But maybe that's just me, IDK.
 
You'll find a lot of people that subscribe to the "shoot the film as much as possible in camera" and some won't even grade in post but try and make everything perfect on-set. To me that's a recipe for disaster and incredibly limiting. Of course, I only shoot narrative work and don't need fast turnaround time for billable services.
 
Iamof the school ...shoot for dark ( or whatever) and leave room for post control.

You can darken in post... but it is also important to light (or de-light) the scene in a way that a dark scene would look.

ie. the quality of light changes because the sources change and the light direction changes. Color will change as will contrast.

BTW - you should not get "noise" by "under exposing" some of your levels and tones.
 
What he said. Sensors need light to avoid noise. They like daylight balanced light, and plenty of it. If you have faces in this scene, and you want to see them later without noise, it's best to grade them down later, but keep in mind the ratios of light to dark on the set. It all depends what you want to see on screen.

Do tests.
 
Like many other variables, it depends! I always expose for the light, and light it like I want it to look, not worrying over the dark. I cannot do anything about the dark, or shadows, except add light to them or ignore them. How far you can push underexposure is really, really dependent on how you want the result to look. You do not push a DSLR to underexposure and think you'll breathe life back into the scene in post. You can push a little, but only a little before all your noisy friends show up and wreck your party, right? Thing is about DSLR's, they'll produce noise right on down the ISO chain until you reach near the bottom. If you underexpose you'll find noise in the dark corners of the frame, or anywhere it is dark but not 0. We get away with it because we usually begin with a decent exposure,or our overall scene is well lit, or, or, or..those variables.
I've got a scene that is just a fire-light with the talent in a midshot filling 1/2 the frame and he looks fine, just like a fellow sitting at a fire, which he is. There is noise and even some banding I think, and it might even fly without noiseware, but I used Neatvideo to get rid of the noise I didn't want to see. If I shot that scene again, I'd at least do another take and lift the exposure more to see what difference it makes. but as it is, it looks very natural, the fire, his yellow almost orange coloring and so on.

I also shot a performance this year with three camera angles. We used ISO 3200 to 5000. and only one of the camera files looked bad. The one that looked bad was the guy that chose to ignore what I told him about ISO. I told him to use the ISO I'd set at 5K and let me worry over the noise. He thought he knew something better so he chose a "LOWER" ISO, but kept the rest of the settings the same and voila, He created more problems going to 3200 on his cam than the chick on cam 2 did with staying at 5k ISO.

Nothing trumps testing or experience! So get to testing!
 
I subscribe to the (perhaps somewhat old school) method of getting what you want on-set/in-camera. If it's meant to be a dark scene or a night scene, I'm going to make it look dark or like night time. I'm not going to light it and count on those in post to hopefully understand what I was going for. Not only does it cost extra to spend extra time in the grade, but IMO I see no point in adding more light to a scene that doesn't need it, just so in post they can essentially bring that light level down to what it would've been anyway.

Admittedly, I shoot very little on DSLR, and there is generally room for post control (as Shooter mentions) - the post house is going to grade the film anyway, but I'd rather start with a base that I'm very happy with than spend an extra 4 hours just to get a single shot down to what I wanted, and could've had on set in the first place.

The only exception to this is when I shoot Red - I will light the way I want, stop down to see what I'm going to get and then open up to make use of the entire range and make sure the histogram is balanced. I kinda hate working that way, as I find it somewhat counter-intuitive, it seems somewhat pointless to me to open up and make the most of your dynamic range, only to crush it back down in post anyway. I do it on the recommendation of Red technicians I talked to the first time I shot Red. That's part of the reason I push for Alexa as much as possible if we're shooting digital.

Maybe I'm just old school. Maybe in 20 years, DPs will just be Camera Operators and all the lighting, colour and mood decisions will be made in post.. I certainly hope that doesn't happen/
 
Last edited:
Learn to work with decent lighting ratios and establishing "levels" between your dark areas, skin tones, and highlights. By working with a certain dynamic range on set, it will allow you to effectively "grade" or adjust contrast of only a very specific range within your image. ie. crushing blacks but keeping your mid-tones (ie. skin) where they are.

lighting FLAT is a popular look, but later in post if you adjust contrast it will adjust the entire scene since it will be impossible to easily separate parts of the scene... unless you want to get into masking / rotoscoping different parts of your scene.
 
I shoot cinestyle (custom tweaked to my liking) with my 7d. For shadows with detail I expose so that its not hitting below 20 IRE (where noise lives). I also keep my ISO on the clean ISO's for the 7d (160,320,640). When I go in post I have enough detail in the shadows so that I can darken them and still retain nice detail with low noise. Below are 2 pics from my last music video which I believe is ISO 160...320 the most. The first one is ungraded. In the shadow area I had a diva 400 dimmed down to raise the light levels to where I wanted on the IRE scale (i expose with false colour on my Zacuto EVF). The 2nd pic is the graded pic...i could have pushed the shadows more If i liked and still have enough detail, however I was fine with this look. As some1 mentioned...its all about lighting ratios. If you light 2 brightly you'll have some serious masking to be done. I dont see the point in that if I can start the look in camera and finish it in post.
 

Attachments

  • dark scene flat.jpg
    dark scene flat.jpg
    31.2 KB · Views: 0
  • dark scene graded.jpg
    dark scene graded.jpg
    34.7 KB · Views: 0
Last edited:
We were taught to do everything, well at least most, on-set/in-camera so you get sufficient leg room when it comes to post. There's nothing like a pissed off editor who needs to do a lot of hocus pocus on FCP or whatever, for a shot that would ultimately come out noisy anyway. It would just bum the both of you out. Its a pretty good idea to light your scenes brighter and just darken it on post, it saves a whole lot of time and is easier to fix.
 
If you have a light meter, use it! Decide on your ratios before you roll the camera and you not only will have repeatable, consistent exposures every time, but will also know exactly where to expose in order to give yourself the most post flexibility. If you don't have a light meter, get one!

If you're exposing in-camera, which isn't a nonviable way to work these days with a decent monitor, then light closed down one stop from where you want to shoot.
 
We were taught to do everything, well at least most, on-set/in-camera so you get sufficient leg room when it comes to post. There's nothing like a pissed off editor who needs to do a lot of hocus pocus on FCP or whatever, for a shot that would ultimately come out noisy anyway. It would just bum the both of you out. Its a pretty good idea to light your scenes brighter and just darken it on post, it saves a whole lot of time and is easier to fix.

Yes, also darkening (pulling) footage in post typically introduces less noise then say if you were to shoot too dark and have to brighten (push) it in post.

If you have a light meter, use it! Decide on your ratios before you roll the camera and you not only will have repeatable, consistent exposures every time, but will also know exactly where to expose in order to give yourself the most post flexibility. If you don't have a light meter, get one!

If you're exposing in-camera, which isn't a nonviable way to work these days with a decent monitor, then light closed down one stop from where you want to shoot.

I use a lightmeter on all my shoots indoor or outdoor. It is the best way to repeat your lighting ratios, hours, days or weeks later if needed if you have to re-shoot something or even if you have to setup a scene you already tore down because the director missed something. I work with ratios using my meter, waveform monitor, or spot meter built into camera all the time.
 
Also any suggestions on how I would light a room so it's dslr and looks as if no lights on (except for maybe a lamp)? How would I do this do it looks natural dark room?
 
i thought the answer to all this was in contrast ratios. for example, when i light a low key scene, im aiming for approx 4:1, so I light the faces for 80 IRE and then fill the shadows till most of them them hit between 20-30 IRE.

now on set, this looks a little bright for a night scene, but once you get it in your NLE and start increasing midtone contrast and overall brightness with levels and color curves, its starts to look good.

Then again, ive been playing around with hard light for the past few years, and its easy to get a nice crisp 4:1 on set. Not sure yet how i would attack a more low contrast, soft lit night look. I guess the answer is to light for 2:1 or such, and then darken the overall level in post?? my head hurts already. I FRAKKING HATE HATE HATE HATE HATE SOFT LIGHT FOR NIGHT/LOW KEY. I should suck it up and focus all my energy on learning to light girls well in hard light. then again, im learning to use my small softbox for this well enough, i guess. sigh.


sounds like OP is not only asking about noise but missing some basic knowledge about how to light for "night/dark".

im not expert enough to explain this fully, but ill say dont aim to create "night" or "no lights" aim to create low key, reall y-- notice in my avatar drac's face is fuly lit, but you can still tell its "night".
 
Last edited:
There are lots of examples here in these forums, I guess searching for them is difficult. :D

One way is to turn the lamp on and boost the ambient level in the room to a point where you reduce the contrast between the overall "dark" room and area where the lamp is lighting up.

To boost ambient you can setup a very large diffusion panel and aim some lights through it. These lights can be open face, even cheap 500w construction lights but you will want to control the spill of them so they don't end up lighting more of your room by leaking out the sides and raising ambient even more. A cheap diffusion panel can be made with a shower curtain if you have no money for a real one. Just watch it doesn't melt, but it will work.

Another way is to aim a fresnel into the top corner where there table lamp is located, this will fake it so it looks like the practical lamp is illuminating the scene, but this method can produce too high constrast of a scene for my liking.

There are other ways of boosting ambient like aiming a light at the ceiling and dimming it to a point that makes you scene still look dark but offers some light in the shadows so it looks good on screen.
 
Back
Top