

JPNola
Veteran
Consider going with example 1 but adding some uplight on the back wall. I see where you said you are already using all the lights you have, but you can inexpensively pick up something like this at a Lowes or Home Depot:
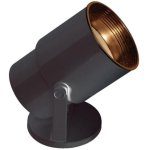 or this
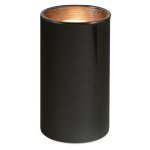
Use black wrap to create a snoot if you want the output to be more narrow than the unit provides otherwise. You can also place black wrap with a pattern cut out of the black wrap directly over the unit to create output that is more broken up / patterned. Being mindful of what the heat of the lamp will do to the black wrap and aware that it will not create a defined pattern since the lighting unit isn't a fresnel.
I've used these for years as one of my "secret weapons" in my kit. You can put a halogen spotlight bulb or flood bulb in it and place everything on a dimmer that can also be purchased at the hardware superstores. The effect you will be going for is either what I call a "low glow", a pool of light low on the wall that frames the subject's shoulders and diminishes as it "bleeds" upwards OR a streak of light effect achieved by placing the lamp close to the back wall and using a spot bulb. The unit in the first image, the unit that tilts, is best for the low glow look. Place the lamp right behind where the subject is seated and aim it at the bottom of the back wall. Tilt the angle of the lamp upward until you achieve the amount of glow you desire. The purpose here is to give the back wall varying levels of luminance. To make the back wall no longer "flat".
I used to have to do interviews in tiny exam lanes for infomercials for laser eye surgery. The trick for me was to control the spill from the key lightand crucial in that was using a chimera light bank with fabric grid on the front. It allowed me to light the subject's face with rather soft light while also avoid having the light from that soft key spill all over the small room and onto wall behind the subject. Often I had to place the light at a steep angle in order to keep the key off the back wall. That steep angle necessitated a bounce / fill very close to the edge of frame and positioned more underneath the face than to the side of the face.
Know that this is a very difficult lighting situation. It would be far easier to light were it a narrative piece ( feature film ) where the individual would only be on camera for a brief period and you could be much more stylized with the framing and lighting. In many ways lighting a narrative film is easier than lighting for this sort of talking head interview work. Especially since feature films have the luxury of super-speed lenses, a truck full of lights, and an entire grip dept. to shape, control, and cut the light at the desire of the DP. My every shot would be killer were it that I had at my disposal what a feature film DP has at theirs. :laugh:
From what I see in your test examples you know what you are doing and have good skills.
Caring is most of the battle.
or this Use black wrap to create a snoot if you want the output to be more narrow than the unit provides otherwise. You can also place black wrap with a pattern cut out of the black wrap directly over the unit to create output that is more broken up / patterned. Being mindful of what the heat of the lamp will do to the black wrap and aware that it will not create a defined pattern since the lighting unit isn't a fresnel.
I've used these for years as one of my "secret weapons" in my kit. You can put a halogen spotlight bulb or flood bulb in it and place everything on a dimmer that can also be purchased at the hardware superstores. The effect you will be going for is either what I call a "low glow", a pool of light low on the wall that frames the subject's shoulders and diminishes as it "bleeds" upwards OR a streak of light effect achieved by placing the lamp close to the back wall and using a spot bulb. The unit in the first image, the unit that tilts, is best for the low glow look. Place the lamp right behind where the subject is seated and aim it at the bottom of the back wall. Tilt the angle of the lamp upward until you achieve the amount of glow you desire. The purpose here is to give the back wall varying levels of luminance. To make the back wall no longer "flat".
I used to have to do interviews in tiny exam lanes for infomercials for laser eye surgery. The trick for me was to control the spill from the key lightand crucial in that was using a chimera light bank with fabric grid on the front. It allowed me to light the subject's face with rather soft light while also avoid having the light from that soft key spill all over the small room and onto wall behind the subject. Often I had to place the light at a steep angle in order to keep the key off the back wall. That steep angle necessitated a bounce / fill very close to the edge of frame and positioned more underneath the face than to the side of the face.
Know that this is a very difficult lighting situation. It would be far easier to light were it a narrative piece ( feature film ) where the individual would only be on camera for a brief period and you could be much more stylized with the framing and lighting. In many ways lighting a narrative film is easier than lighting for this sort of talking head interview work. Especially since feature films have the luxury of super-speed lenses, a truck full of lights, and an entire grip dept. to shape, control, and cut the light at the desire of the DP. My every shot would be killer were it that I had at my disposal what a feature film DP has at theirs. :laugh:
From what I see in your test examples you know what you are doing and have good skills.
Caring is most of the battle.

