Homemade Ultracheap/ultralight ENG/Doc rig

mcbob

Veteran
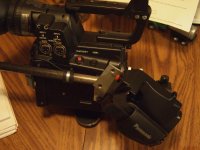
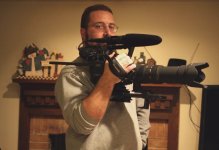
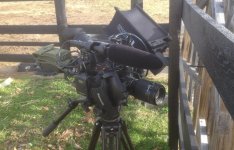
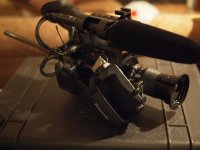
I think I've finally finished my AF100 rig modifications. Goals were to add handheld stability, negligible size increase, and negligible weight increase, adaptable, with an adjustable forward handle with a stop/start button. Here's the finished product. Handles splendidly.


If anybody's interested, I'll put together a fuller, more formal DIY demo... just let me know
AF-ENG_34sm.jpg
 
Very cool! I was fumbling with the AF-100 grip a while back thinking how I could get it on a rail mount by the lens and if only it had a tally. You did it. Well done. Please share!
 
Ok, so first the rundown of the materials list:
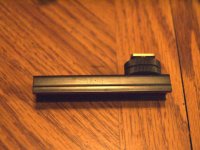
- 1 Cinevate universal rail block
- 2 plates aluminum bar stock, 6" x2"x1/8" (or just buy an entire 4 foot bar)
- 5 1/4-20 x 1/2" or so bolts
- about 1.5" of 1/2" ID copper pipe or similar 5/8" OD tubing
- Momentary switch
- 2.5" headphone plug and suitable wire (or scavenge an old cell phone headset or the like)
- 1 15mm rod, 18" or longer
- solder, heat shrink tubing

I had most of this stuff on hand, so it cost me about $6 for various bits... Rough pricing would put it at about $60 worth of parts, $40 of that being the Cinevate block and $12 of that the 4'x2"x1/8" aluminum.

Tools needed
- hacksaw
- drill
- bits (1/4, 7/64, 1/2" or 5/8"- others depend on switch style)
- tap (1/4-20)
- soldering iron and torch
- small straight and rat tail files
- paint to suit

Some pics and directions shortly
 
OK, time for some pictumatures...

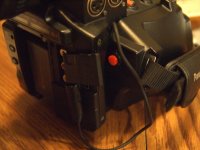
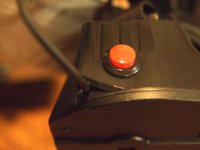
First is fairly easy, adding a record button to the proper place in the AF100 stock side plate. This is mighty easy since the handle is mostly hollow plastic. Grab your favorite style momentary switch and wire it to a 3-pole 2.5" plug scrounged from wherever you scrounged one. When drilling the hole for the wire out, just be mindful of where it might sit if you put the handle back in the standard location, and also how much wire you'll need to put the handle where you want it plus a stress relief loop inside the handle. Loads of previous tutorials cover wiring a remote record button for the AF100, so I won't rehash the specifics.

AF-ENG_handleplain.jpgAF-ENG_handlebutton.jpg

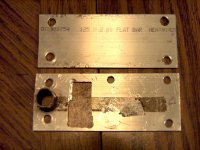
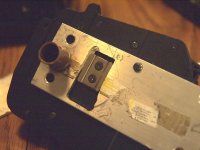
The "rig" starts by drilling a mess of 1/4" holes in the pair of aluminum plates. I found 6" was just long enough to prevent the forward edge of the rig from appearing in either my Lumix 7-14 or my Kern-Switar 16mm. Test exact lengths with your Oly 12's and 14 or 20 pancakes to see what works best for you. The rear set of holes are spaced to bolt to the AF100 body, and the front set are spaced to bolt to the 1/4-20 holes in the Cinveate rail block. On one of the plates, you'll also need to cut:
- a large squared hole for the 'shoe mount.' Ideally you'll want to size it larger on the bottom for insertion and then mill or dremel-grind two flanges to hold the shoe mount. I munged mine up and originally put the hole in the wrong place, so I only have one shoe flange... but it works just the same.
- one or two ~7/64" holes and tap them for 1/4-20 thread (for the stock handle bolts).
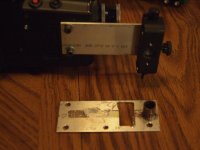
AF-ENG_plates.jpgAF-ENG_handle_plate_cutout.jpgAF-ENG_handle_assembled.jpg

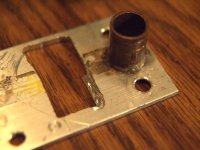
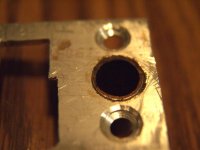
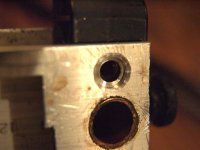
The other bit you'll notice on the handle plate is the 5/8" tube. In this instance, I used 1/2" ID copper tubing (5/8" OD)... you may have sturdier material handy, and if so, use that... but the copper tubing seems to work just fine. Carefully drill a hole in the plate JUST large enough to hold about 1.5" of this tubing; ideally, the hole should be tight enough that it will not slip out and may indeed have to be tapped into place. Affix the tubing to the plate with silver solder (or, in a pinch, rosin core works fine, too). I would refrain from using any sort of epoxy instead, this joint will be receiving a good amount of stress. For similar reasons, also don't laze out and try to get away without sinking the tubing into the handle plate.

Once that's together, you see why I used the Cinevate block. The 5/8" tubing slides into the perpendicular central hole, and can be fixed at your ideal angle with a set screw of your choosing. For extra security sacrificing flexibility, you can countersink the 1/4" holes on this end and use flush-mount bolts to hold the handle plate tight as anything.
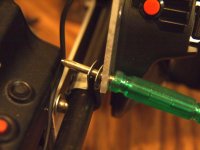
AF-ENG_handleplate_solderback.jpgAF-ENG_plates_plus_block.jpgAF-ENG_framework.jpgAF-ENG_handleplate_safetybolt.jpg

At this point, it's essentially done. You can leave it at this point, affix the handle, and you're ready to go with a forward-mounted grip.

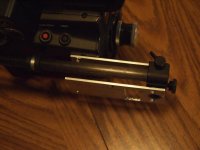
The further beauty of the rail block, however, is the ability to add some mighty handly and simple shoulder support. Simply cinch a 18+" 15mm rod into either rail block hole, and you're majestically steady. If you're a tender Nancy, you can pad the rail with one of several various single-rail pad options or even simple 1/2" foam pipe insulation. You can also go nuts on the back side adding counterweights or whatever else suits you. I kept it simple.

The shoulder rail can be bolstered and supported to both the handle and body by use of basic pipe mounting bracket hardware. With all but the heaviest lenses and counterweights, this isn't necessary. Don't have space/need for the shoulder rail? Remove it in about 5 seconds.

My personal preference was to use the rail in the upper mounting position, dropping the center of gravity for the whole rig below the shoulder. Mr. Newton then does most of the work of keeping the camera from tilting side-to-side. It's also in a good position to easily use either the EVF or the stock LCD with a loupe.

Last, I topped it off by affixing a long shoe adapter to the vacated handle shoe position. This lets me put a wireless receiver and/or external recorder very near the gravitational axis. I have no recollection of the make/model.


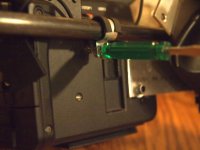
AF_ENG_side-complete.jpgAF-ENG_handle_support.jpgAF-ENG_body_support.jpgshoe-adapter.jpg


That's pretty much it, then. Maybe it could use some paint if you're fashionable.

I know what you're asking, though... will that simple solder joint be strong enough to hold my (insert heavy lens/monitor/mattebox/camera-top-HMI here)?


AF-ENG_Bigmatic.jpg

More than likely. If you're frightened, insure it with the brackets mentioned above or some strategically countersunk holes in the handle plate, or extend the body plate back to bolt into all 4 body handle holes.

Hope it's helpful.
 
Why do people always extend their lenses out on the longest end when taking these photos? I think it's hilarious.

Cool rig though. Looks like a laser canon when you hold it like that.
 
What, you wouldn't handhold a shot at 1000mm? :D

I really did want to don full face camo and have the "in action" photo with me roaring a war cry, leaping from the skids of a fully armed news gunship, but this scripting was shelved due creative differences with the cameraperson.
 
Well, just goes to prove I should stay on the other side of photographic equipment.

Been fiddling with it a little more, and added a bit of a shoulder pad (guess I'm a gossamer Nancy after all) with a milsurp belt pouch the perfect size to hold two extra batteries or a single lens (or an M14 magazine if I happened to need it). Adds a little counterweight and a nice puck to hold under your arm while shooting from hip level.

If Olof's stuff weren't so dang nice I'd consider refining and selling this thing, it works spiffily.

AF-ENG_pod 2.jpg
 
I don't suppose you have just the pair of pre-cut, pre-drilled, pre-soldered aluminum for sale? This looks so simple and cheap that I'd love to build one myself, but I don't think I have the tool for it right now. Mostly lacking the stuff to drill/cut it. I do have a soldering iron, though I'm not sure what you mean by "torch"...Oh well, it can be a project down the road.
 
Back
Top