HMC 150 and Cine City matte and rail

jwrtiger

Member
I am planning on retiring this year and just wanted a hobby so I choose this field. I am a novice when it comes to using video so take the following with a grain of salt. I wanted to play around with a matte box and flags from Cine City and filters for my Panasonic HMC 150. I looked around on this forum and checked YouTube but couldn’t find the information I needed about their products and the HMC 150. Cine City had a compatibility list and it did list the HVX 200 which has similar dimensions to the HMC 150. I ordered the Cine matte box with cine rail system for DV/HDV and DSLR Camera. The price was $425.00 and it arrived at my house in California from India six days later. The items were undamaged, well packed and in 13 different plastic bags. The following is my review in two parts of the systems with pictures.

The first section is the matte box with flags and a holder for two 4”x 4” filters.


DSC_0553.jpg

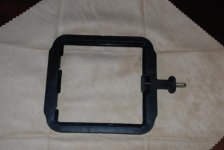
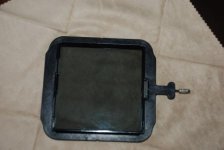
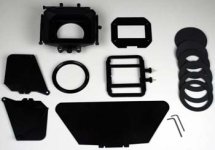
You get the matte box a French flag and two side flags. There is a 4:3 and 16:9 format masks. Since the 4:3 was pre-installed, I just left it in and it seems to not interfere with the HMC 150. In the picture just below the matte box is a large screw-on plastic ring. This is used to hold the appropriate foam donut. They give you five donuts and one that is blank shown on the far right. I used the largest open diameter 81 mm donut and it seems to fit the HMC 150. I crudely tested the seal between the matte box and the HMC lens using an LED flashlight and could not detect any light spill into the video frame. Also shown in the picture are two 4” x 4” filter holders and they capture the filters in a spring mechanism. Both filters can rotate 360 degrees but once attached to the rail system they are limited to about 240 degrees. Included in the kit are a couple of Allen wrenches for minor modifications if needed.
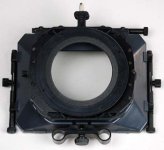
DSC_0559.jpg

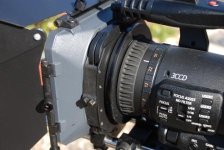
This is the back of the matte box with the 81 mm donut installed. You can see three knurled tension adjustment knobs on the matte box and adding or removing the flags doesn’t require any tools. On the bottom is a plastic holder for the support rods. This holder is not tall enough for the HMC 150 and has to be removed.
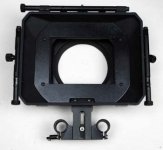
DSC_0577.jpg

This picture shows the installed and adjustable metal holder for the support rods. The small black knob on the left of the holder tightens both split rod clamps at the same time. This has plenty of adjustment (over 1-inch) for the HMC 150.
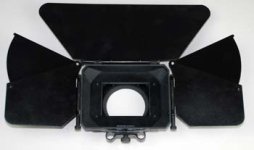
DSC_0560.jpg

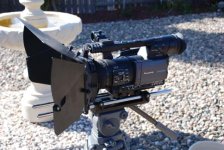
This picture shows the flags installed on the matte box and it was very easy to do and required no tools. The flags are made out of metal and the gray portion of the matte box is thick plastic. The black painting on the metal flags and the metal format frame is only fair. The paint is not complete smooth over the entire surface of these metal parts and there are areas that show trapped dust particles. Probably not painted in a clean paint booth. Having said that the overall appearance is not really bad and I do not think it effects the operation of the device in anyway.
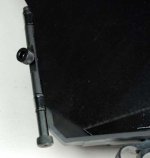
DSC_0564.jpg

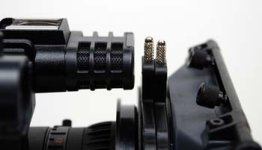
This is a close-up of the flag mounting hardware.
 
Last edited:
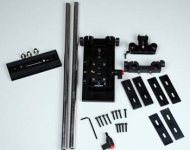
In this part two section I would like to discuss the rail system.

DSC_0566.jpg

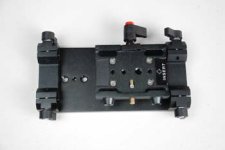
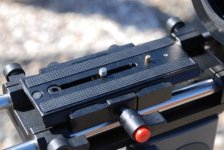
This system has a quick release plate, 45 cm stainless steel support rods, shims, and some screws. The longer rod lengths should allow me to add a follow-focus system or 35 mm adaptor. Not sure if this was a packing error but I received a second quick release knob (knob with red button at bottom of picture). The shims come in pairs of three sizes. Since their thickness is not listed anywhere that I could locate here are the approximate sizes: 0.23-inches, 0.11-inches, and 0.04-inches.

DSC_0572.jpg

Most of the pictures on the Internet for this system from Cine City show only a front split collar clamps for the support rods. I received a second one and there are holes in the rear of the plate for mounting. This picture shows both clamping fixtures fastened to the 0.4-inch thick bottom plate. The gold button on the plate is the safety interlock that must be pressed when adding or removing the quick release plate (not shown).

DSC_0568.jpg

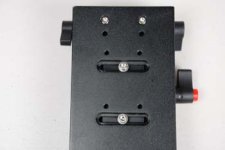
Turning the bottom plate over you can see that there are also horizontal adjusters to the rail system. The slots are about 1.6-inches and they allow you to move the quick release pedestal to position the HMC 150 for correct alignment with the matte box.

DSC_0573.jpg

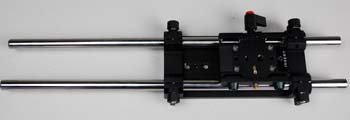
There is a problem with the horizontal adjustments for the HMC 150. With the rails installed as you see in the picture they interfere and limit the horizontal range. The HMC 150 needs to be offset to the left side when looking from the front of the system. I really would have like about 0.1-inches more travel but with a little tweaking I got everything to reasonable lineup. By the way each 15 mm diameter rod weights about 11.75 oz and when the rail assembly is clamped to the bottom plate I think you could easily support a large Buick without the system flexing or failing. The whole rail system weights in at about 3.75 lbs. The matte box is another 13 oz and with the flags totals out to 1.4 lbs.

DSC_0580.jpg

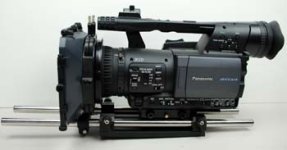
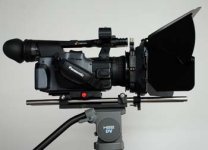
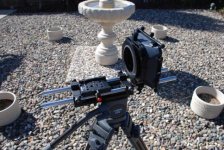
This picture shows the completed system less flags with the HMC 150 mounted. The slight incline shown in the picture is just the results of the forward mounting bracket for the matte box touching the table.

DSC_0586.jpg

Notice that even when the filter frames are positioned up they do not interfere with the onboard microphones. Again these frames can be rotated but not independently and are locked into place by small thumb screws.

DSC_0589.jpg

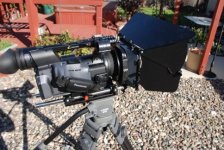
This picture shows the matte box with flags mounted onto my Libec TC 60 with the H22 head. I was worried about weight and balance of this system. I used a dowel and found that to my surprise that the HMC 150, rail, matte box and flags was nearly center balanced. However when I mounted it to the H22 head it was very back heavy. This head has a three position spring system to compensate for this and in one of those positions I was able to get fairly good balance. I do not think that having these accessories color match the HMC 150 really affects the picture quality but the gray of the matte box is almost the same as the gray sections of the camera and even the red quick release matches the HMC 150 red buttons… cool!

I obviously need to learn and play with these devices more but overall I think this is a good product and when including price I am very satisfied. Hope this review helps.
 
Last edited:
Thank you for the very detailed and visual review. Let us know if anything about its design stands out in the field during practical use.

So what do you plan to shoot with your new hobby?
 
Thanks modus, I don’t retire until the first part of June but I plan to play around with green screen and hopefully make a few tutorial videos using the HMC 150 for on site shooting, and animation software. I think one of the first projects will be on wind farm maintenance training.
 
I was on winter holiday and so I got sick (figures) then came major rain for the central coast of California so I haven’t had a chance to get out and play with it. Also our college starts the Spring semester tomorrow. I did order a glass filter kit for the matte box and hope to report on it in the near future. Jakobim, since it is a hobby for me I wanted a rail system for future devices and the kit seemed a better purchase. I also like the idea of the rails to effectively remove weight from the camera's lens. The only contact with the camera lens is a soft foam donut. I know there are matte boxes that mount directly to the camera but I think I am more comfortable with the rail arrangement. October Black, I will have to see how well the flags stay on, I did notice that they move a bit.
 
I bought this matte box in spring it worked fine but by Sept the french flags had rusted making quite the mess in my case.
 
What alternatives are there to this rail package? Also, j, what do you mean by "tweaking" to get the thing to fit right on the rails?
 
Ken thanks for the comment on the flags rusting. I bought mine months later than yours so I have taken a closer look at the flag material/metal. My flags are very light and I tried a magnet test which seems to show they are not made from a ferrous material. It appears that they are now made from aluminum and so I shouldn’t have any rust problem. 8string, the tweaking means I had to adjust a few things to get the camera to be perpendicular to the matte box. Those adjustments were a slight offset to the foam donut while pulling the camera pedestal all the way to the left. Sorry if that sounds confusing. There is a little play when using the largest hole donut so I was able to shift the lens over that extra 0.1-inches. I checked the video and the offset didn’t cause a problem that I could detect. I will try and do some more testing and complete a report on the filters.
 
As promised here is my next part of the review of the matte box and rail system.

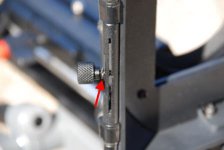
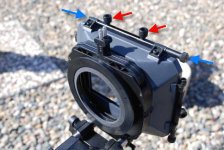
October Black sorry it took so long to respond to your question about the flags falling off of the matte box. When I first got the system it did seem like that area could be a problem, especially the top French flag. The following explains what I did and how it might help others. I thought I might add lock washers to the thumbscrews but on closer inspection they were already there, red arrow. All the knurled thumbscrews for fastening the flags to the matte box have split ring lock washers.

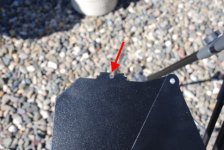
As you can see in the picture the side flags use a slot attachment scheme. (09)

DSC_0609x.jpg


The side flags have a tab and “U” notch as shown in this picture. (10)

DSC_0610x.jpg

The top French flag doesn’t use a slot and just attaches to the rod with two thumbscrews. I found if I removed the thumbscrews and then made sure when I attached the French flag that the lock washers were on top of the flag’s plate this technique secured the top flag tightly to the matte box.
The two thumbscrews with lock washers are identified by the red arrows. The blue arrows highlight the thumbscrew on the right of the adjustment rod and an Allen screw on the left. (07)

DSC_0607x.jpg

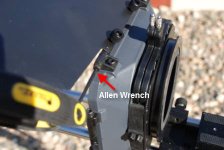
I noted that even when I tighten the right thumbscrew the French flag could move up and down with minor shaking. I didn’t want to break the attachment systems but by using an Allen wrench and holding the thumbscrew I gave it just a slight additional tightening and it really locked it down.
This picture shows the Allen screw being tightened. (15)

DSC_0615x.jpg

After using these two techniques on the rail system – matte box, less camera, I really tried to shake the flags free or at least make them move. I encountered no real movement and I think only hitting a stationary object might cause the flags to go out-of-alignment. I know matte boxes do not require rocket science but I did run a couple of simple tests. One test was to point the camera in the direction of the sun, (not directly at the sun) which was at about eleven o’clock elevation. Looking at the resulting video I could see three strong lens flares one near the top of the frame and the other two about one-third of the way down. Adjusting the top French flag quickly took all three out without affecting the rest of the shot.
 
Last edited:
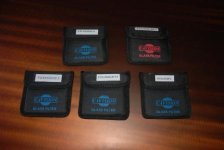
As I indicated in my first post I wanted to try some filters. Again since this is a hobby for me price was a major concern. I purchased the Cavision 4” x 4” Glass 5-filter set for around $200.00. Some vendors stated the filters were 3-mm thick and some stated they were 4-mm thick. The ones I got are around 4-mm thick so they were a tight fit in the Cine City filter holders.
Here is a shot of the 5-filters. (18)

DSC_0618x.jpg

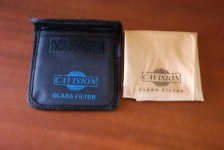
Each filter comes in a nylon bag with a Velcro flap and they are wrapped in a soft silk-like cloth. (20)

DSC_0620x.jpg

Here is a close-up of one of the two filter holders and the second picture shows the polarizer filter installed. (22 and 23)

DSC_0622x.jpg DSC_0623x.jpg

Polarizer worked well and I also tried the graduated blue filter to accent the sky. Not much to say, they worked as advertised and the holders allowed for easy adjustment.
 
Last edited:
Finally a few shots of the system.
Here is a picture of the matte box and rail system without the quick release plate and another with the plate. (02 and 06)

DSC_0602x.jpg DSC_0606x.jpg

I can install the camera on the quick release plate, then on the tripod, and then balance it with flags in less than 3-minutes.
A few more of the system. (28, 33, and 36)

DSC_0628x.jpg DSC_0633x.jpg DSC_0636x.jpg


After doing these additional tests I am still happy with my purchase.
 
Last edited:
I too purchased from Cinecity, however I got their Rails+Shoulder Mount+Matte+Follow Focus combo for around 899$, Love it so far, a few issues but what can I expect for the price.
 
I actually really like it, its a pretty solid build, of course its my first one. There are some small issues, and probably not the most professional one obviously, but it works pretty well. My adapter was a tall one and the focus is only one height level so for a bit I couldn't use it but I came up with a good DIY, The follow focus is two pieces, top screws into bottom, I just put like 4-5 spacers in between and I was good to go. I'd recommend it if your strapped for cash a little.
 
I actually really like it, its a pretty solid build, of course its my first one. There are some small issues, and probably not the most professional one obviously, but it works pretty well. My adapter was a tall one and the focus is only one height level so for a bit I couldn't use it but I came up with a good DIY, The follow focus is two pieces, top screws into bottom, I just put like 4-5 spacers in between and I was good to go. I'd recommend it if your strapped for cash a little.

is your matte box with swing away..?

i would like to buy if it strong..
what about the gear of follow focus?

will post it with picture..

thx for advance..
 
Back
Top