DIY IndieSlider...

It is doubtful that the problem is the Igus rail. They are really stout. I had the same problem with my slider mounted on a 501 head and half ball leveler. It just could not handle the load. Now I use a strong photography tripod with Manfrotto 577 rapid connect adapter attached directly to the tripod and sliding mount plate with 2 bolts attached to the rail. Works pretty good now with no bending.
 
Last edited:
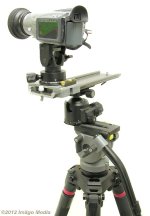
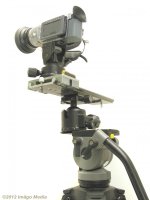
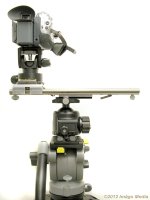
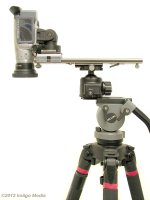
One thing that gets me down in the linked video is how when you slide the whole camera rig back and forth (from about minute 2:29 or so), as you move away from the center where the slider is mounted to the tripod, the slider bends down as if made from wet spaghetti - watch the right side especially (toward the operator). It can't take the weight. I don't know if the problem is that the slider wasn't mounted tightly enough to the tripod so there is play, or if there is play in the tripod head itself, or if it's the slider itself that flexes. Either way, it's very, very depressing. Maybe the solution is to always have a tripod on either end of the slider, so it's a two tripod operation (or light stand or whatever) - kind of a downer if you can't just quickly mount the slider centrally on one tripod. I wonder if other sliders are more rigid, or it's a question of length. But flexing like that is not really acceptable.

It is doubtful that it is the Igus rail. They are really stout. I had the same problem with my slider mounted on a 501 head and half ball leveler. It just could not handle the load. Now I use a strong photography tripod with Manfrotto 577 rapid connect adapter attached directly to the tripod and sliding mount plate with 2 bolts attached to the rail. Works pretty good now with no bending.

That is the real igus rail...and I just quickly screwed it on the tripod, it's an old Bogen 3046 and I didn't check the adjustable center column (it wasn't locked in place)...so that is where you see the flex. That rail does NOT flex at all. The idea was to hear and see the difference in the carriages. Checkout the demo slides in the end, no movement up or down. My bad for not fixing it, but again, I did it for a user that wanted to see the difference in the carriages.

You could set a piece of the igus rail over a few cinder blocks and stand in it without bending it...it is SUPER tough stuff.

Lots of users do use two tripods (one on each end), so there's always that. I have only used it center mounted for over 4 years now with no problems.
 
Thanks guys... just to make it clear I wasn't claiming that it HAD to be the slider that's flexing, just that something was flexing, so it's nice to have it confirmed that it absolutely was NOT the slider. Not meant to disparage the product at all.
 
12"... well it works...but I still think the 700mm I carry is about the shortest I'd go. It gives you a good 2' of slide and comes in very handy in tight spaces. PLUS, I can pop it off the tripod and throw it on my shoulder for run & gun shooting.
attachment.php


...and WOW.... over 700,000 views of this thread & still going strong!

Cheers :beer:
 
12"... well it works...but I still think the 700mm I carry is about the shortest I'd go. It gives you a good 2' of slide and comes in very handy in tight spaces. PLUS, I can pop it off the tripod and throw it on my shoulder for run & gun shooting.


...and WOW.... over 700,000 views of this thread & still going strong!

Cheers :beer:

Nice!
 
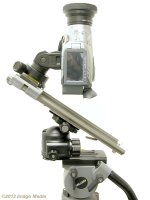
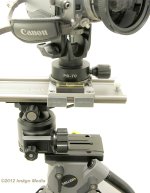
So now I've pushed the Igus thing in a slightly different direction to meet the need of hybrid/still and video shooters. I ditched my still Gitzo Giant years ago ( BIG mistake) and now need some way to approach my still life pics off my Miller, DS10 which is my lightweight video support. Since no center column is made for most tripods of this class; I fiddled with my 12" Igus rail a bit. Works nicely for odd-angle video work too.If I add Zaza's hybrid handles/feet, I'd have a three in one rig!!! Have a peek....
Igus12_1.jpgIgus12_2.jpgIgus12_3.jpg
The decision to truncate the Igus DryLin-W platform/carriage in the axis of travel, was made so as to increase slide travel by one inch total. This is not typically meaningful on a long rail, but on a 12" rail it's provides a meaningful extra bit of travel for a dolly shot.The asymmetrical friction ball of the SunwayFoto Ball Head, combined with the adjustable friction of the video head, give the hybrid photographer/videographer added control and minimized risk of sudden camera 'drops'. Note: camera will pan in 3 places and tilt in 3 places !
Igus12_4.jpgIgus12_5.jpgIgus12_6.jpg
One of the major constraints of Fluid Head video tripods is that they use internal springs that allow for smooth and slow tilts, desirable for video applications. The problem for still photographers is that the typical 45º limit is not a sufficient angle for many shots. By introducing a SunwayFoto Ball Head between the Miller DS10 fluid head and the camera, a huge variety of camera angles can thus be accomplished. The 12" lateral arm allows for downwardly angled shots that will avoid the tripod
--
This Video Head rig has two purposes: 1) Extends the limitations of a video tripod head by adding flexible camera maneuverability for still photo work 2) The Igus® DryLin-W rail (in 12"-24") not only acts a functional tripod lateral arm; but also as a camera slider or PortaDolly®. The 12" variant shown is compact and multifunctional.
 
Last edited:
Hey guys. I've had mine mounted to a saw horse since I built it. It was a decent idea, but not all that practical, which means I've barely used it. What are the methods for mounting it to a tripod?
 
Hey guys. I've had mine mounted to a saw horse since I built it. It was a decent idea, but not all that practical, which means I've barely used it. What are the methods for mounting it to a tripod?

Just drill & tap a 3/8"-16 hole in the center of the rail....then just screw it on your tripod (just like your head does).
More instructions here: http://www.zazaslider.com/instructions.html

Or... you can attach a QR plate on the bottom of the rail and pop it on your head (on the tripod).
 
Just drill & tap a 3/8"-16 hole in the center of the rail....then just screw it on your tripod (just like your head does)

More instructions here: http://www.zazaslider.com/instructions.html

Or... you can attach a QR plate on the bottom of the rail and pop it on your head (on the tripod).

Thanks for the reply! And of course for all of the helpful information in the first place about this slider.

Yeah, I don't think I'd go through the trouble of taking the head off of my tripod, screwing the slider onto it, and then having to swap the head back on with my work. So the quick release plate on the bottom of the rail is the method I was wanting to go for. My dad is a (construction) contractor-- and I'm not so good with "those" kinds of tools on my own. lol. When he was helping me build the slider, I wanted to go the QR plate route, but he was worried that the plate would slide around too easily. Like how a DSLR can if it's not tightened since it doesn't have the little hole for the little part that pushes in on the QR plate (what is that thing called??) like traditional video cameras do. That's not a big deal for a DSLR-- just take it off the tripod and tighten it back down where the QR plate is straight. But with all the weight of the slider, even being a little loose could be quite bad.

So I'm thinking we could maybe drill a little hole for "that push in piece" on the QR plate to go into. What do you think? If that's recommended, what size hole should we go with?

Thanks again!

Sorry for the late reply.... I drill & tap a 1/4"-20 hole with the same spacing as the "little push in thingy"!
 
Hi there. Time to add my bit to this humongous thread.

ive got a 16-60 rail and standard carriage. I am mostly interested in motorized timelapses, although use the slider for normal pan shots as well.

i am looking for a motion control rig which can traverse my 600mm rail in say, 1 hour.

this rail and carriage combo has now been around for a while, is there an agreed best way to achieve motorised movement? I've seen lots of links to lots of individual componants, and I'm not averse to putting something together myself, just I don't see an exact list of tried and tested bits.

I would be looking to get a longer rail eventually, so would like the kit to swap onto that, with an extra length belt of course. I think I prefer belt not screw because I will be looking at extra length soon.

camera is canon 5DmkIII. Not a crazy heavy set up.

any help or opinions are great fully received.

cheers.
chris.
 
Last edited:
Back
Top