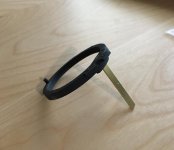
Just "finished" my DIY focus collimator device. Been wanting to build one for a while to check the back focus adjustment on our ENG cameras at work, and to use to set up lenses after I've fixed them and check mount swap and adapter length, etc. When I bought my GH2 a while ago, it came with a bunch of misc. lenses, so for this project I choose a decent lens in an FD 100f2.8 breach lock that I couldn't convert to EF. Everything I've read says that you should use a long lens for this type of creation, so I thought the 100mm would be good. Last week I decided enough was enough and I was going to build this thing. Found a suitable (non-functional) Canon T50 on ebay for $12 shipped and when it arrived I wasted no time tearing it apart.
This first two things that must be done are to get the mirror out of the way, and get the shutter out of the way:


After removing the prism, the mirror is held up by aluminum tape. The shutter was brute force removed and cut off where I could get on it.
Then I needed to create a pattern and print it, I used transparency film and printed with a laser printer, there are other more simple ways to get this done too.

I'll need to add a light behind this, but you could also use paper and put a light in the viewfinder space and front light it. I may move back to this and front light, depends on the kind of trouble I have fitting a light behind the transparency material
Looks like this:

Shooting down through the lens (at infinity):

On my rig:


And the as seen from the GH2 taking camera:

and focus mag:

What you can't see in these pictures is that if everything is at the right distance, you can clearly see the texture of the transparency material and the individual dots of toner melted together. That's how I know I'm at the correct distance with this lens and this adapter (LensTurbo). (edit: I guess you can see the texture a little bit)
That's about it, go forth and modify! More info can be found on the web with explanations of why this works. I can repeat this here if needed.