35mm adapter rig photos

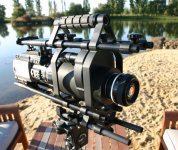
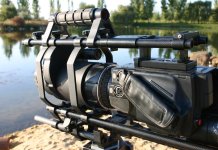
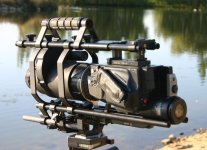
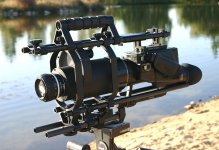
Easom DIY adapter and rig.

Easom DIY adapter and rig.

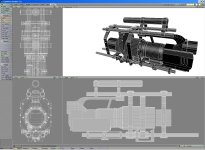
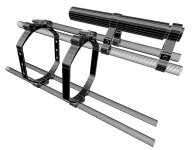
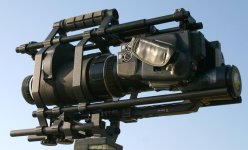
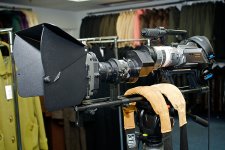
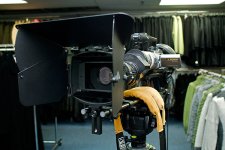
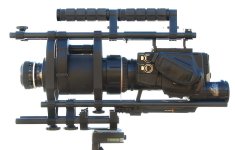
Here's my own Rig. It's based on component adaptable pieces. The rail/cage spacers are designed to accept either the clamp pieces or the handle/flip accessories. I started thinking most rigs start to look very busy around the flip drop/follow focus area. As long as you have one attachment point, you may as well make use of the attachment block for more than one accessory. The handle can mount to the rail spacers or seperately as well as the flip drop rail blocks. I'm redesigning the camera mount so it will be component also and attach to any accessory as well as the new tripod block. Till then, this is what the unit looks like. I will then tackle a follow focus/smallhd monitor bracket and strap a mattebox to it and start filming.

Special thanks to user 'Postmaster' for motivating me to complete a proper hvx/dvx adapter and user 'Kholi' for the the motivation behind the cage spacers and handle. Most people freak out and start drooling when I take it out of the case.

The whole story is here http://www.dvxuser.com/V6/showthread.php?t=110922
 

Attachments

  • easom-1.jpg
    easom-1.jpg
    88.7 KB · Views: 1
  • easom-5.jpg
    easom-5.jpg
    165 KB · Views: 1
  • easom-4.jpg
    easom-4.jpg
    132.1 KB · Views: 1
  • easom-3.jpg
    easom-3.jpg
    82.8 KB · Views: 1
  • easom-2.jpg
    easom-2.jpg
    129.8 KB · Views: 1
A few more images.

A few more images.

More pics.
 

Attachments

  • easom-8.jpg
    easom-8.jpg
    180.6 KB · Views: 0
  • easom-7.jpg
    easom-7.jpg
    76.2 KB · Views: 0
  • easom-6.jpg
    easom-6.jpg
    99.4 KB · Views: 0
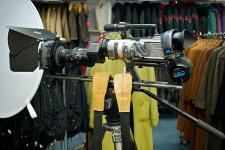
I thought I'd share a few production stills of the rig I used a few weeks ago to shoot a small commercial for a local clothing store using a Sony VX2100 with the Cinevate Brevis MP.1:
 

Attachments

  • rig_01.jpg
    rig_01.jpg
    128.9 KB · Views: 1
  • rig_02.jpg
    rig_02.jpg
    122.2 KB · Views: 1
  • rig_03.jpg
    rig_03.jpg
    107.2 KB · Views: 1
That is a work of art Easom.
I also think its a good idea to have rails at the top and a cage all the way round the camera. Makes carrying and moving the camera much safer, im constantly worried im going to break the top handle on my camera.

Did you CNC cut all of that yourself or send it out to a machine shop?
 
Machining

Machining

That is a work of art Easom.
I also think its a good idea to have rails at the top and a cage all the way round the camera. Makes carrying and moving the camera much safer, im constantly worried im going to break the top handle on my camera.

Did you CNC cut all of that yourself or send it out to a machine shop?

I designed all the parts in Lightwave 3d and Corel Draw 12, then my brother cuts them out on our water jet. It shoots water and garnet dust through a small hole in a diamond. It's really loud, but cleaner than an oily cnc machine. It does hold you to 2 dimensions, but that's how we make all the mil spec stuff, so it works pretty well. Then we powder coat them. Thanks for asking... Oh! and for anyone who didn't notice, the camera is upside down. That works really well also. Cory
 
Mm interesting. I CNC cut all my camera parts on a 5 axis CNC mill (not mine unfortunatly). I didnt use a water jet mainly because the jet is not quite straight. The cut it makes is tapered, so when you have a 15mm rod grip, it grips better on one side of the clamp than on the other, which places all the stress on a small area, which I dont really like the sound of.

The finish on a water cut is much nicer though.

How do you find the powder coat, does it not decrease the ID of the clamp slightly? I only leave about .2mm clearance for my rod clamps....
 
Dynamic

Dynamic

We have a dynamic head on the unit. You're very correct though. Without the dynamic (constantly tilting) head, the cuts would be tapered. We could not live with the taper so we splurged on the tiltomatic unit. We use .3mm as an offset for the powder coat. Also designed a very small taper at the clamp edges. My first attempt at clamps bit into the rods.... Ouch.
 
Thats cool, must have cost a fortune. i like the 5axis though, can cut out properly 3d shapes.

My first attept at clamps worked fine, but I specified 15.2mm not knowing that rods are 14.8mm OD so had 0.4mm clearance and the clamp had closed fully before the rod was gripped sufficiently.

Why are you not anodizing just out of interest?
 
I thought I'd share a few production stills of the rig I used a few weeks ago to shoot a small commercial for a local clothing store using a Sony VX2100 with the Cinevate Brevis MP.1:

That's a cool rig. It's not often we see a standard def adapter rig other than the dvx.
 
Cages are cool. However, I'd prefer to see one with a flipped adapter on it. Working with a camera's controls upside down seems too problematic to me.
 
Hi,

This is my SGpro r3 flip, follow focus, with FD backfocus ring and XY adjustment gizmo + new achromat. Also have the redrock mattebox. We stuck it on my freinds EX1. I have some footage but its stuck on the SxS card, will have it tomorrow.

n506442569_818134_6077.jpg

n506442569_818135_7058.jpg

n506442569_818136_7908.jpg

n506442569_818137_8764.jpg

n506442569_818138_9622.jpg
 
Ex1 / Brevis Rig

Ex1 / Brevis Rig

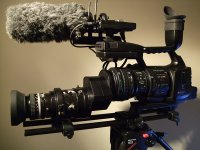
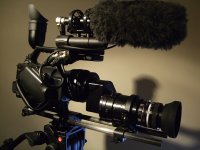
Here's my Ex1 / Brevis rig.

• Cinevate 'Shorty' Proteus system with 45cm rails
• Brevis35 with cfXL screen and flip unit.
• Nikon 50mm f1.4 AI lens with Nikon HR-2 lens hood.
• Sennheiser MK416 & Rycote softie on Rode SM5.
• Sony UWP-V1/67 wireless receiver.

The only real mod was cutting down the support bracket for the brevis so that the block doesn't hang down below the rails, making it easier to stand it on things.

I wasn't sure if I could get the brevis on the rig using the shorty rails but it goes on perfectly and I like that the whole rig is low on the rails yet still allows plenty of access to the controls.

First clips:
http://www.vimeo.com/1821069
http://www.vimeo.com/1804930
 

Attachments

  • brevis_rig_1.jpg
    brevis_rig_1.jpg
    117.4 KB · Views: 1
  • brevis_rig_2.jpg
    brevis_rig_2.jpg
    108.1 KB · Views: 1
Last edited:
haha, sorry Latin, my stills camera is extremly pathetic, I keep meaning to get a DSLR, but so far, havn't.

Its a pretty quick and easy point n' shoot jobby.

Good enough anyway :-D
 
Old one, but a good one:

IMG_3621.jpg


Chroziel Mattebox
Panavision UltraSpeed II 150mm T1.5
P+S Teknik mini35 Adapter
HVX-200
Aaton Bauer Battery Pack
Ultrascope MKIII Geared Head
 
Oh, and Jagstang... your Cinevate / Brevis setup is the best for the HVX I've worked with thus far. Aside from the cheap (construction-wise) Brevis, I am a huge fan of this adapter.

Luckily, Brevis has a new carbon fiber weave for their late-model adapters. They fare a lot better under harsh production conditions. Well done on a sweet rig.
 
Back
Top