Jacob_A_Hauser
Member
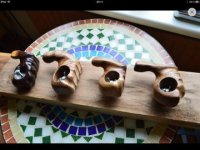
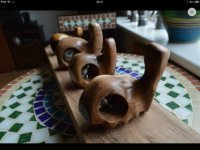
For the better part of a year I have been researching about building my own wooden handgrip for my camera setup. I would rather buy one as I am no a master woodworker, but with a price tag inching above $700 dollars as is the case of the Vocas product I have taken the DIY route. So I bit the bullet, a rather cheap bullet, and started in about a month ago. I’ll give you a rundown of all the tools and materials. I in no way, shape, or form represent any of the companies I have provided links to below.
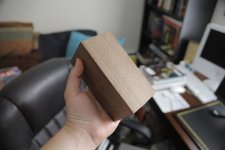
First step was to find a wood blank for carving, big enough for the part of the grip that goes over your thumb groove but not too wide that you waste a lot of the material you are buying. I bought this walnut peppermill blank here. The 3x3x6 size worked just fine for me and should for everyone else.
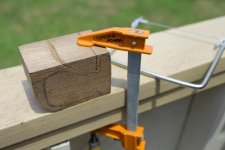
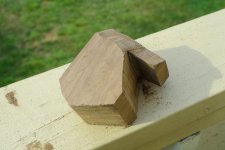
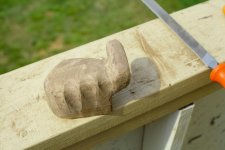
Already possessing some basic tools such as clamps, a coping saw, and a drill. I took a trip to home depot to buy a set of metal rasps or files. For this I needed a variety of curved, flat, and round rasps. I cut out the bulk of the unneeded material with the coping saw. Then as patient as I could set about carving and shaping for what seemed like days, probably about 10 hours total until I had the general shape down. If you have a heavy workbench vise it will make carving a whole lot easier. But patience is necessary.
Taking 80 grit sand paper I sanded it for about 30 minutes smoothing the surface all over then progressed to 150 then 220 and finally 400. Each time you move up in grit it takes more exponentially more time for the same surface. But it will be silky smooth if you stick with it! Once this was completed. I tung oiled the grip. I have applied two coats and it looks and feels great. Be sure to give it at least 12 hours to cure for each coat. I plan on polishing a clear-coat on top for further protection and it will see quite a bit of handling.
Now the problem that held me back most was how to attach the grip to the camera. The Vocas version as well at the Aaton grip have an adjustable rosette or locking serrated plates as they are known in the industrial universe. A CNC part would push the cost way up unless I had my own machine shop. Not to mention how to attach the rosette to the camera. So I scrapped that route and took a fresh approach. I happened upon an image of a GPS mount for a car and I had one of my “Eureka!” moments. What if I use a heavy duty ball-joint? As a side note after completing this project I discovered that the company Cinevate uses the same ball joints for their grips.
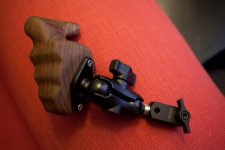
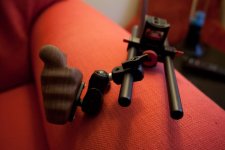
My next purchases were from amazon. I bought the ball to attach to the grip, a ball with a 1/4-20 thread on the other end, and a short aluminum socket arm. I went with the 1” ball to keep size down. This configuration gave me a 1/4-20 thread end to attach wherever I desired. I wanted to clamp it onto my rod system so I went to my good ol’ pals at Berkey System and picked up a 1/4-20 threaded rail block. I drilled two holes to mount the ball to the grip with wood screws and a tiny bit of glue in just to be safe. Then just connected it all together and… Voila!
The finished product works great, I just used it on a shoot in conjunction with a shoulder rig. The RAM socket ball system was rated to support on 5lbs but it worked fine even at just over 10lbs, just make sure the knobs are all tightened snugly. I’m glad I went the ball mount direction, it gives almost infinite adjustability options as well as vertical and horizontal adjustment from the point of mounting, not even a rosette mount can give you that!
All in all I spent just shy of $100 on tools and materials. This was one of my most fulfilling DIY projects I hope it can be the same for you! I will consider carving one for you if you wish, I have not thought about cost though. My next project will be attaching a record trigger just to the left of where the thumb falls.
First step was to find a wood blank for carving, big enough for the part of the grip that goes over your thumb groove but not too wide that you waste a lot of the material you are buying. I bought this walnut peppermill blank here. The 3x3x6 size worked just fine for me and should for everyone else.
Already possessing some basic tools such as clamps, a coping saw, and a drill. I took a trip to home depot to buy a set of metal rasps or files. For this I needed a variety of curved, flat, and round rasps. I cut out the bulk of the unneeded material with the coping saw. Then as patient as I could set about carving and shaping for what seemed like days, probably about 10 hours total until I had the general shape down. If you have a heavy workbench vise it will make carving a whole lot easier. But patience is necessary.
Taking 80 grit sand paper I sanded it for about 30 minutes smoothing the surface all over then progressed to 150 then 220 and finally 400. Each time you move up in grit it takes more exponentially more time for the same surface. But it will be silky smooth if you stick with it! Once this was completed. I tung oiled the grip. I have applied two coats and it looks and feels great. Be sure to give it at least 12 hours to cure for each coat. I plan on polishing a clear-coat on top for further protection and it will see quite a bit of handling.
Now the problem that held me back most was how to attach the grip to the camera. The Vocas version as well at the Aaton grip have an adjustable rosette or locking serrated plates as they are known in the industrial universe. A CNC part would push the cost way up unless I had my own machine shop. Not to mention how to attach the rosette to the camera. So I scrapped that route and took a fresh approach. I happened upon an image of a GPS mount for a car and I had one of my “Eureka!” moments. What if I use a heavy duty ball-joint? As a side note after completing this project I discovered that the company Cinevate uses the same ball joints for their grips.
My next purchases were from amazon. I bought the ball to attach to the grip, a ball with a 1/4-20 thread on the other end, and a short aluminum socket arm. I went with the 1” ball to keep size down. This configuration gave me a 1/4-20 thread end to attach wherever I desired. I wanted to clamp it onto my rod system so I went to my good ol’ pals at Berkey System and picked up a 1/4-20 threaded rail block. I drilled two holes to mount the ball to the grip with wood screws and a tiny bit of glue in just to be safe. Then just connected it all together and… Voila!
The finished product works great, I just used it on a shoot in conjunction with a shoulder rig. The RAM socket ball system was rated to support on 5lbs but it worked fine even at just over 10lbs, just make sure the knobs are all tightened snugly. I’m glad I went the ball mount direction, it gives almost infinite adjustability options as well as vertical and horizontal adjustment from the point of mounting, not even a rosette mount can give you that!
All in all I spent just shy of $100 on tools and materials. This was one of my most fulfilling DIY projects I hope it can be the same for you! I will consider carving one for you if you wish, I have not thought about cost though. My next project will be attaching a record trigger just to the left of where the thumb falls.