

Shigeta
Well-known member
Greetings fellow filmmakers!
I'm sure most of you have seen the color editing technique called "Bleach Bypass."
From Wiki:
(Technical Jargon)
Here are some examples of a Bleach Bypass'ed image:
Believe it or not, one of those images is made by yours truly. Can you guess which one? :cheesy:
The Tutorial
Yes, yes, I know Andrew Kramer did one, blah blah blah, but if you wanted to see it actually done with some practical tips, this is your article.
I started with the raw footage shot from my Canon t2i
Imported directly into After Effects after being transcoded to Medium settings in Neoscene
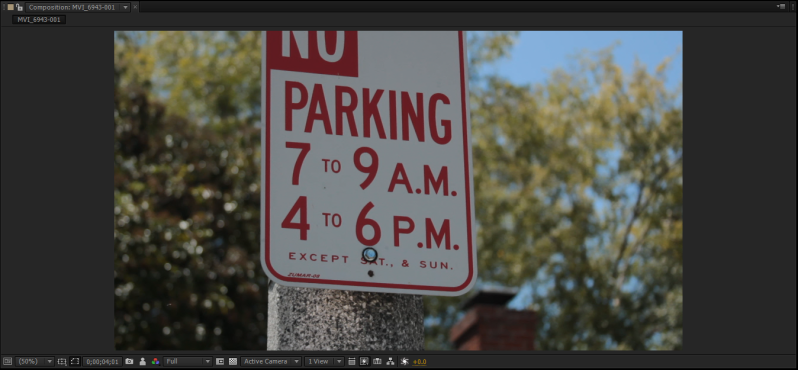
Added a Brightness and Contrast Adjustment

Went for a washed out image. I start out around 40 or so on the brightness filter

Brought up the contrast. I start around 50 or so with contrast and adjust accordingly at the end

This image is with Contrast at 55 and Brightness at 38

I added the CC Composite Effect and changed the transfer mode to Color


Here is the resulting image- Not done yet. Tree edges are blown and sky is "over exposed" along with some other things.

New Adjusted Image

Using These settings:

*Note: These settings are not one size fits all. It should be adjusted according to YOUR image. I know alot of you guys just copy exactly what Andrew Kramer does and it all looks the same! Make something that is YOURS! People like originality, not something you copied off a website
Here is my example:
Bleach Bypass Example on Vimeo
Don't have After Effects? You can download a trial here
I'm sure most of you have seen the color editing technique called "Bleach Bypass."
From Wiki:
(Technical Jargon)
Bleach bypass, also known as skip bleach or silver retention, is an optical effect which entails either the partial or complete skipping of the bleaching function during the processing of a color film. By doing this, the silver is retained in the emulsion along with the color dyes. The result is a black and white image over a color image. The images usually would have reduced saturation and exposure latitude, along with increased contrast and graininess. It usually is used to maximal effect in conjunction with a one-stop underexposure
Here are some examples of a Bleach Bypass'ed image:
1.

2.
3.

4.

5.

2.
3.
4.
5.
Believe it or not, one of those images is made by yours truly. Can you guess which one? :cheesy:
The Tutorial
Yes, yes, I know Andrew Kramer did one, blah blah blah, but if you wanted to see it actually done with some practical tips, this is your article.
I started with the raw footage shot from my Canon t2i
t2i Settings:
~1080p 30p
~Faithful Picture Style
~Canon 28-135mm USM IS lens
~100% Handheld with battery grip
~1080p 30p
~Faithful Picture Style
~Canon 28-135mm USM IS lens
~100% Handheld with battery grip
Imported directly into After Effects after being transcoded to Medium settings in Neoscene
Added a Brightness and Contrast Adjustment
Went for a washed out image. I start out around 40 or so on the brightness filter
Brought up the contrast. I start around 50 or so with contrast and adjust accordingly at the end
This image is with Contrast at 55 and Brightness at 38
I added the CC Composite Effect and changed the transfer mode to Color
Here is the resulting image- Not done yet. Tree edges are blown and sky is "over exposed" along with some other things.
New Adjusted Image
Using These settings:
*Note: These settings are not one size fits all. It should be adjusted according to YOUR image. I know alot of you guys just copy exactly what Andrew Kramer does and it all looks the same! Make something that is YOURS! People like originality, not something you copied off a website
Here is my example:
Bleach Bypass Example on Vimeo
Don't have After Effects? You can download a trial here
Last edited: