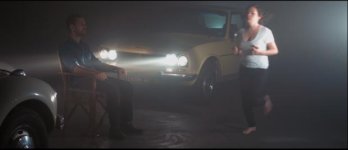
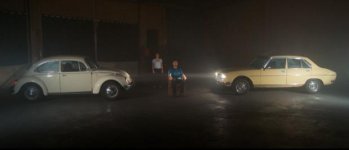
How should I light this scene? How useful will the car headlights be?

Fluoro

Well-known member
There will be two stationary cars facing each other in a warehouse. The idea is that all the light comes from the headlights. There are two performers who will each be singing live. In the first scene they will both be sitting on the back seat of each car. Then they get out and most action takes place between the two cars where it needs to look like they are being illuminated by just by the headlights. It's doing my head in a little bit on how to light this. Car lights seems to come in all sorts and I don't even know what cars we are using yet. Should I have two Arri 650w Fresnels to use for close ups and on wides just rely on the car lights? The idea is to use cars that are older (80s) so I'm not sure if that adds another layer of difficulty. Can I get special globes that will work better?

This is a tiny budget shoot and basically I'm not expected to do anything fancy but I just want to push the quality up a notch. I've hired a hazer already that should work well to add volume to the lights.

Thanks for any thoughts. Here's a silly looking image just to show the general idea. The space between the cars is where most of the action will take place.
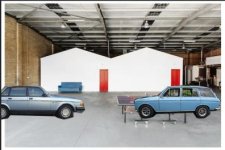
Screen Shot 2013-10-16 at 1.06.51 PM.jpg
 
If you need to show two beams each from a car, one option is to remove the headlamps and place lights instead and power from the batteries placed in the cars. Using only the actual carlights can lead to some uneven lighting which would be bright at the centre.
 
The other thing to keep in mind is that car headlights don't actually shoot straight ahead. They direct a lot of their light downwards so they don't blind other drivers (or singers in back seats). You can cheat this a little by using the high beams which will send their light a little higher, and also by adjusting the lights in the car. There's usually a few screws that adjust the light direction, and failing that you can just loosen them up and shim then to aim higher. Just make sure you can put them back in the right orientation when you're done. <- mark a spot on the wall where the beams hit with pieces of tape, then adjust back to that when you're done with the shoot.
Also, the only shot that needs to actually use the car headlights is the wide shot in the haze. Everything else can use other lights, reflectors, fills, spots, flags, scrims, whatever lights and modifiers you have to make it look good. People will assume that the light is headlights after a single establishing shot of the two cars.
 
Thanks for the good points guys! I'm thinking that I shouldn't worry too much about the car lights because like Andrius said they are mostly just needed for the wide shots. The tough part of this shoot is I don't have a lot of lighting experience and bringing car lights into the equation is really not helping. But I guess I'll just try and keep it simple. I just have to remember the audience is not going to be analysing every shot thinking "is that really a car light".

I'm not very good at mechanical stuff and at the moment my biggest worry is how to use the car lights without killing the battery. Should I just turn the engine on every half an hour for five minutes? Would that do the trick?
 
You can't just run the engine; you have to drive it at speed for a little while -- probably 10 minutes to be safe, depending how long you've been draining it.
 
You can't just run the engine; you have to drive it at speed for a little while -- probably 10 minutes to be safe, depending how long you've been draining it.

Thanks. Another reason to rely on the car lights less. It's not me that wants to use the car lights just the director who doesn't want to rent lights... This will give me a good excuse to get him to bump the lighting budget!
 
I'd strongly suggest keeping the car lights on their low-low beam setting, the lowest they'll go, then use your Dedos to project the car 'beams' on the singers. I'd strongly push the director to at least hire a couple of 650w or 300w fresnels, because they'll give you a bit more oomph to work with.
 
A piece of opal cut out and neatly taped (with clear packing tape) over the lights can do wonders for making them light talent for a wide shot. Newer ones tend to have a pretty sharp top edge of the beam which is usually below waist level, but some light diffusion will take this away and spread the beam. I recommend opal since it's a very thin material and it's easy to fold as required to fit the curvature of the headlights, but something even lighter like hampshire frost (which doesn't fold as easily) might be more desirable. Opal is dense enough that with a certain exposure level, you might actually see the piece of diffusion in your shot since it will absorb some light, much less likely with hampshire frost. You could also use brushed silk, this will only spread the beam in one direction instead of both horizontally and vertically.
 
Thanks for the extra bits of advice guys. It all helped.

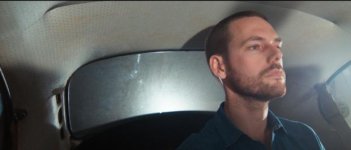
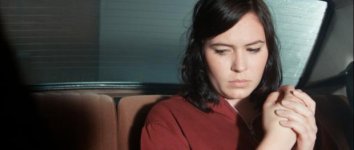
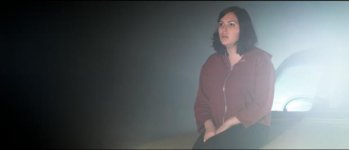
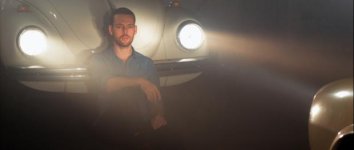
Well the shoot went well, all things considered. There wasn't enough time or lighting power to really do it how I would have liked but I learnt a lot. The director brought along a set of four cheap chinese redheads which all seemed to stop working after a few minutes, for I don't know what reason. The stands they came with didn't work properly either... It was my first time working with cheap chinese lights and hopefully my last if they are anything to go by. So all we had to light it with was a 800w fresnel, a Redhead (20 year old secondhand Italian made DeSisti to the rescue!) and two Dedolight 150s (and the car lights here and there). I just turned the car lights on when they were in shot and luckily no dead batteries... It was interesting how different in quality the two cars lights were. The VW had very weak lights compared to the Peugeot.

I know the end result is nothing special but as long as I learn from it right?

Just realised I forget to follow the 180 degree rule for the shots of them inside the car. It's not too important because it's an abstract arty piece but still I should have known better. I might just flip the image of the guy...

Screen Shot 2013-11-22 at 6.17.32 PM.jpgScreen Shot 2013-11-22 at 6.00.03 PM.jpgScreen Shot 2013-11-22 at 6.00.59 PM.jpgScreen Shot 2013-11-22 at 6.01.13 PM.jpgScreen Shot 2013-11-22 at 6.03.36 PM.jpgScreen Shot 2013-11-22 at 6.03.55 PM.jpg
 
Last edited:
I'm a big proponent of getting the look you want on set and in-camera, but I'll bet those shots will look pretty decent with some grading. The brightness helped preserve a lot of detail, and could almost be a lesson to that effect -- planning to light a dark scene brighter with the intention of lowering levels in post.
 
I'm a big proponent of getting the look you want on set and in-camera, but I'll bet those shots will look pretty decent with some grading. The brightness helped preserve a lot of detail, and could almost be a lesson to that effect -- planning to light a dark scene brighter with the intention of lowering levels in post.

+1
I once fought an entire film crew lighting a scene in a club way brighter then the final look intended, but in the end the result was a great looking dark club scene. Just make sure to get your light meter out and get your ratios right.
 
Yeah I actually had to tell the director not to panic when he looked at the monitor because it looked really bright.
 
Back
Top