Help with my DIY Kino.

RyDz

New member
Hi,
I would like to say what an excellent resource this forum has been, truly brilliant.
I am on the last hurdle of building a DIY kino from bits and bobs around the internet,
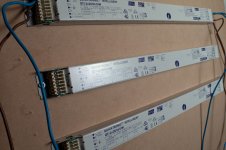
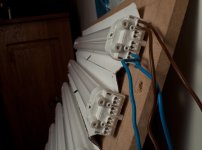
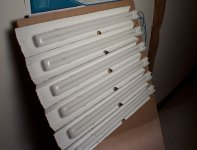
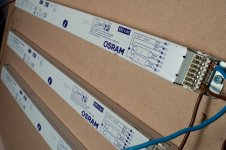
Its a 6 tube fixture, supporting 3 ballasts, but I am stuck on the wiring part.

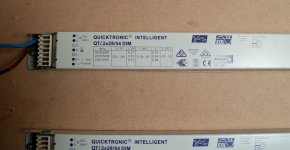
I have asked my uncle, a qualified electrician to wire it for me, but he is truly stumped as he is not familiar with these new pl-l T5 fixtures, the ballasts are Osram Quicktronic Intelligent QTI DIM 2x28/54w

I plead for help and have included a few pictures below.

Many thanks and regards

Ryan
 

Attachments

  • light-1.jpg
    light-1.jpg
    201.1 KB · Views: 0
  • light-3.jpg
    light-3.jpg
    171.2 KB · Views: 0
  • light-2.jpg
    light-2.jpg
    136.2 KB · Views: 0
  • light-5.jpg
    light-5.jpg
    130.3 KB · Views: 0
  • light-4.jpg
    light-4.jpg
    95.8 KB · Views: 0
The wiring diagram is right on the front of the ballasts though as it is on most ballasts. Each end of a tube has two contacts on it in any T5. If its a 2G11 type as yours is, all 4 contacts are on one end. 2 and 2 paired. 2 punch in connections right beside each other on the 2G11 socket represent one side of the tube, the other two on the other side are for the other side of the tube. Just follow the wiring diagram.
 
Thanks for the reply,
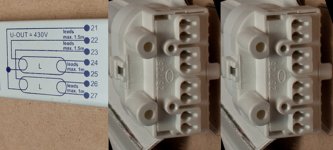
Having trouble with which sockets the wires go into, am I missing something obvious?
I've attached a picture of the holes and diagram, if someone could complete the diagram it would be greatly appreciated, beyond belief!

Thank you
Ryan
 

Attachments

  • wire.jpg
    wire.jpg
    228.1 KB · Views: 0
There are eight holes on the end of the socket. They are connected together in pairs. The first pair are connected together, the second pair together, third pair together, and the fourth pair together. This is is so that you can "daisy chain" some wires to multiple pins (such as node 21 on your ballast). Note that you need to connect only ONE of each pair. The second hole is provided as a convenience.

I have drawn the circuit diagram here...

OsramBallastWiring.jpg
 
Last edited:
Richard,
Thank you so much, it works perfectly, I feel like flying over to the states to shake your hand, you've done me a great favor indeed.
For months have I been researching how to wire these ballasts and I was defeated, until now.

Expect to see contributions to the community from me in the future!

Thanks again Richard and Coolights.

Ryan
 
Back
Top