Fix Audio Cable That's Lost Its Ground?

Jonathan_Healey

Well-known member
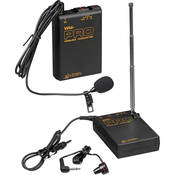
I have a lav system like the one pictured below. My wire on the receiver pack is starting to go. I don't know if "loosing its ground" is the proper term. Here's whats happening. The wire pictured on the right has to be toyed with and bent around in order for the signal to pass through. This seems to happening more towards the plug end rather than the pack end of the wire. Can I fix this by maybe replacing the wire? I know it's a low end system and I should probably just buy new lavs but it's worth a shot.
3656.jpg
 
Can you solder? Or know someone who can?

Go ahead and replace the wire. Look slike a standard plug, so you can probably replace the whole thing eaily.
 
I used to own a soldering iron but it's since lost. I could probably buy a new one. I don't think it would be that hard to do myself? So what you recommend? Cut the cord close to the box and then solder a replacement?
 
Are there any visible signs of wear on the wire? Any small cracks, or anything? If not, it might be the connections inside the pack.

If it is the wire, don't cut too close to either end, or you may find you don't have enough room to do the soldering. You can get the materials you need pretty cheaply at Radio Shack or Frys. For this kind of thing, even the cheapest soldering iron should work.

I would suggest using shrink tubing to cover the solder joint, which has to be put on the wire before you solder (since it is too narrow to fit over the connector). Just slide it far away from the heat, then when the joint has cooled, slide it over the joint and hit it with some heat and watch it shrink tight. That way you won't have any sticky electrical tape, or exposed wires.
 
Me, I'd open the case and put in a complete new wire, soldered to the place the old wire is soldered. (It's probably soldered....but they may have gone crazy and used a connector of some kind in there.)
 
One tool that's indispensible in this kind of stuff is an ohmeter or at least continuity checker. With this, you can check both ends of a cable to see where the short or breakage is, then you have the information you need to know which side to fix. Of course, you'll also need a soldering iron and 60/40 tin lead solder too to do this correctly.

In a case like this, I would open up the box (knowing of course, that any warranty left would probably be invalidated if there's a seal or whatever), put one contact of the continuity checker on the circuit board where one of the cable leads connects to and the other end on the ring, sleeve or tip of the connector itself; and if none show connection then you know you have a breakage on that line. Either a cold solder joint somewhere, a problem with the connector itself or a break in the cable. Of course, if you got continuity on that check, then try the next wire and the other two parts of the connector that weren't connected to that first wire, etc. Proceed in orderly fashion noting where everything is connected and you'll eventually find the problem. All debugging is just systematic escalation from simplest possibilities to more complex ones.

I probably wouldn't cut off the cable itself, just the connector and replace it with something new if the problem winds up being at the connector end (and the connector was one of those sealed kinds that you can't get into). If you replace the entire cable, be careful not to make it too long. This is probably an unbalanced signal and they don't like long runs at all--picks up too much noise.
 
Back
Top