
cinecrunch
New member
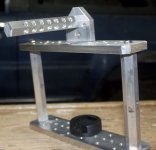
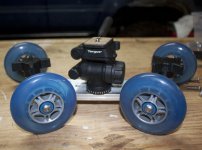
This is my first attempt at a DIY dslr cage. At lot of thought went into the hole / tap layout on the plates.
I have numerous plans for extending the use of the plate beyond the dolly and cage.
The total cost of the project, for everything you see, was $46.
I was tired of feeling like you need to carry around ten different rigs to get the shots you want.
So I decided to build a rig capable of doing more then one thing. This is just two things the rig can do -
I have plans to extend it to be able to do a few more things.
It is rock solid and can handle a 5d without fear of tipping over.
It is still in rough shape and needs to be cleaned up but it is a proof of concept.
Here is a quick video showing the transition from cage to dolly
http://vimeo.com/32491371
More images to come soon.
I have numerous plans for extending the use of the plate beyond the dolly and cage.
The total cost of the project, for everything you see, was $46.
I was tired of feeling like you need to carry around ten different rigs to get the shots you want.
So I decided to build a rig capable of doing more then one thing. This is just two things the rig can do -
I have plans to extend it to be able to do a few more things.
It is rock solid and can handle a 5d without fear of tipping over.
It is still in rough shape and needs to be cleaned up but it is a proof of concept.
Here is a quick video showing the transition from cage to dolly
http://vimeo.com/32491371
More images to come soon.

