Advice needed for Lighting newbie

CraftyClown

Active member
Hi guys,

I need some advice as I feel I am slightly out of my depth. I am an editor by trade but I need to do some camera work for a job next week. I understand basic three point lighting for interviews etc, but that is about the extent of it!

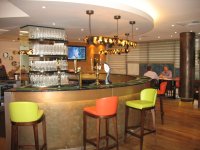
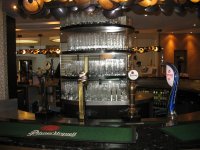
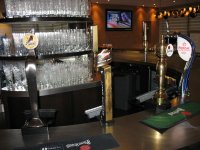
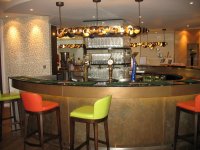
I need to shoot a short piece, explaining how to pour the perfect pint for a UK beer distributor. They want to film it in their own bar. Probably consisting of a barman behind the bar addressing the camera, cutting to shots of the pouring process.

My problem is lighting! I have a basic lighting set up, consisting of two 150w dedos and one 1000w softlight. I also have a small battery powered led top light. I just don't know if this is suitable kit to use. Like I said, my knowledge is very basic! I've been slightly screwed over on this job so I'm not really in the position to fork out more money on it. I'm really hoping I can make do with what I've got, so any pointers would be gladly welcomed.

cheers

Picture 001.jpgPicture 002.jpgPicture 003.jpgPicture 004.jpg
 
As a photographer here is what I suggest. Youtube is great to see a handful of beer commercials, they're short and easy to pound through a bunch. Look for the pours and watch the lighting, reflections on the glass and also the light coming through the glass.

Lighting a person is different from lighting the beer which is different from lighting the environment, so pick which to do at a time and adjust lighting as needed. For a close up pour, have a warm colored light (warm to preference) that is behind and about 45* to shine through the glass. It helps to give a nice glow and adds dimension. For the lighting up front, you're better off having a large soft light from above, good for the hands, tap and beer head, and use some black and white foam cores to shape the reflection on the glass face.

This is all about beauty in lighting. Point sources as key lights won't serve the look well but can do fine as the beer glass "hair light". Practice at home and get a the lighting the way you like it well beforehand then just re-setup on site.

Bed sheets, foam core, metallic paper reflectors, small mirrors are all cheap and can add a lot to lighting. I can light food with one head and a handful of mirrors to add dimension. So think about how the light needs to look on surfaces and work on reverse engineering the placement of the lights.

I find 3 things key to great motion work, great editing, great sound and lighting/framing something to look as great as possible. Do you have any friends locally to help out. Sounds like you're in a pinch. I have a bunch of fellow shooters and we all gladly help each other when it's desperately needed.
 
I don't have too much experience shooting up close beverages, but I recently was the gaffer for a bar shoot. I often got in a nice edge light anytime a glass or bottle was the focus. It gave it a nice shimmer.

Not sure if what you have is enough. Depends what you can shoot at. 150w dedos with diffusion don't give much except a bit of kick.

When in trouble, or if you're never sure what to do, I just fall back onto 3 point lighting. It applies to film (not just interviews) as well if you know how it works in a scene. Think about motivation. The key light is always where the light comes from. Be it an overhead light, a desk lamp, or the sun. The fill light does just that, fill the shadows. The ratio (key vs fill) is dependent on the scene, location, and mood. So determine how strong or weak you want the fill to be. Then the edge light is there to help create separation between the subject and background (and can sometimes be a motivated light as well). Then you have a light for the background.

So you can use your 1000w as the key, and mimic an overhead light as you would see normally in a bar (to the side), get in your LED or two dedo lights (hitting a sheet) for the fill (move it in close as it won't be doing much compared to your 1000w. As it's a bar scene you don't want it to be too high key (no difference between the fill and key), and not too low key (as this is an instructional video and the client will want it 'lit').

If you can get in close enough use one dedo with a sheet for the fill and one for an edge light, hitting both the subject and the beer at the same time. Don't diffuse the edge light as there's no need and you can't afford it with such a weak light. I would then try and hide the LED light to light up the background. Play around, but with an LED and two dedos to work as your edge, fill and background light, you have to get in close (and probably shoot open).

If you find that the 1000w as your key is too powerful compared to your fill (and you can't move it back), then try putting another bed cloth in front of it, or use diffusion paper if you have (or ND if it's diffused enough). Don't be afraid to cut out the edge light if there's enough separation and/or not enough lights (though I recommend it for the closeups of the beer).

Hope this helps!
 
See this video: http://vimeo.com/19775085 . Basically lit with a soft box suspended directly overhead a 650 through tracing paper from behind and a 200 watt for a rim. Very simple.

Here are some more sample pours using the same basic setup but moving the soft source to the side and using a large white bounce to fill back in: http://vimeo.com/7136752
 
Back
Top