scene file settings!

mobiledeli

Well-known member
i thoguht we could share some settings we each have. like i know i personally have found a saving private ryan look, 70's documentary look, minority report etc. but im curious as to knowing what other looks you all have found.
 
alrighty lol., i had to get my camera and then forgot about it. k so mine:

one i use for "tv" shoots
detail level -4
chroma level -4
master ped -4
gamma - cine-like V
matrix - cine-like
30p

saving private ryan
chroma level -7
chroma phase 2
color temp -1
master ped -12
gamma - low
knee - high
matrix - norm
24p
(be sure to add a high shutter speeed!)

minority report
detail level 1
v detail level 2
detail coring 6
chroma level 2
chroma phase -4
color temp 4
master ped -11
a iris -4
gamma - cine like v
matrix - flou
24p

70's
detail level -4
v detail level -7
detail coring 3
chroma level -7
chroma phase 1
color temp -6
master ped 7
a iris -4
gamma - cine like v
matrix cine-like
24p

then i have just a standard F6 one with the master ped down a bit and chroma up a bit. ya know how it is
 
Well... After going through all the posts I could find I came up with this:

RossS
Just shot some stuff where I was looking for a "cool/cold" look. Thought I would share the scene file settings for any and all who wanted to give it a try.

DETAIL LEVEL -7
V DETAIL LEVEL -7
DETAIL CORING -3
CHROMA LEVEL -7
CHROMA PHASE 0
COLOR TEMP +5
MASTER PED -15
A. IRIS LEVEL 0
GAMMA CINE-LIKE
KNEE AUTO
MATRIX CINE-LIKE
SKIN TONE DTL OFF
V DETAIL FREQ THICK
PROG. 24P (ADV)

EyeBright
http://www.dvxuser.com/V6/showthread.php?t=41088&highlight=Scene+settings

I made a video that runs through samples of the 6 Scene Settings on my camera, and then below, I posted the specific settings that make them up. I apologize in advance for the lack of an interesting subject. The only thing I did in editing was add some 1.78:1 bars, because, well, I always do that.

The Video: Scene Settings
18 MB, H.264, Full Resolution

And here are the settings:

Scene Number: 1
Scene Name: Office

Detail Level: +7
V Detail Level: +7
Detail Coring: +7
Chroma Level: -7
Chroma Phase: -7
Color Temp: -2
Master Ped: -10
A.Iris Level: +2
Gamma: Cine-Like
Knee: (Auto)
Matrix: Norm
Skin Tone Dtl: Off
V Detail Freq: Thin
Progressive: 24P(ADV)

Name Explanation:
I called this one "Office" because it's got a desaturated kind of look like they used on The Office(s). Dull, uninteresting.

---------------------
Scene Number: 2
Scene Name: Flou.

Detail Level: 0
V Detail Level: 0
Detail Coring: 0
Chroma Level: 0
Chroma Phase: 0
Color Temp: 0
Master Ped: 0
A.Iris Level: 0
Gamma: Norm
Knee: Auto
Matrix: Flou
Skin Tone Dtl: Off
V Detail Freq: (Thin)
Progressive: Off

Name Explanation:
These are the default settings for Scene #2 - it's in the video just for comparison purposes.

---------------------
Scene Number: 3
Scene Name: Diet

Detail Level: -3
V Detail Level: -7
Detail Coring: -7
Chroma Level: +7
Chroma Phase: -7
Color Temp: -7
Master Ped: -9
A.Iris Level: +3
Gamma: Cine-Like_V
Knee: (Low)
Matrix: Cine-Like
Skin Tone Dtl: On
V Detail Freq: Thick
Progressive: 24P

Name Explanation:
This name, "Diet," goes along with what I called Scene #6 (On Fire). "On Fire" stems from "Man on Fire," and "Diet" is a little less dramatic version of On Fire, in terms of the rich coloring and darkness.

---------------------
Scene Number: 4
Scene Name: Drama

Detail Level: 0
V Detail Level: 0
Detail Coring: 0
Chroma Level: -5
Chroma Phase: 0
Color Temp: -7
Master Ped: -15
A.Iris Level: 0
Gamma: B.Press
Knee: Mid
Matrix: Enriched
Skin Tone Dtl: On
V Detail Freq: Thick
Progressive: 24P

Name Explanation:
This one's called "Drama" because it's dark, and "moody." I don't know what that means, but it comes in handy when you've got enough light to tone it down a little.

---------------------
Scene Number: 5
Scene Name: 24P

Detail Level: -4
V Detail Level: 0
Detail Coring: 0
Chroma Level: -7
Chroma Phase: +7
Color Temp: -7
Master Ped: -12
A.Iris Level: -2
Gamma: Cine-Like_V
Knee: (Auto)
Matrix: Cine-Like
Skin Tone Dtl: Off
V Detail Freq: Thick
Progressive: 24P

Name Explanation:
This is very similar to the default settings for Scene #5 (24P), except the blacks are much more crushed.

---------------------
Scene Number: 6
Scene Name: On Fire

Detail Level: -7
V Detail Level: -7
Detail Coring: -7
Chroma Level: +4
Chroma Phase: -7
Color Temp: +4
Master Ped: -15
A.Iris Level: -2
Gamma: Cine-Like_V
Knee: (Auto)
Matrix: Norm
Skin Tone Dtl: On
V Detail Freq: Thick
Progressive: 24P(ADV)


Here's MTV's Web Video Settings (I'm pretty sure MTV News uses the same):
30p/4:3

DETAIL -4
V DETAIL 0
DETAIL CORING 0
CHROMA LEVEL -4
CHROMA PHASE 0
COLOR TEMP 0
MASTER PED -4
A. IRIS 0
GAMMA CINE_V
MATRIX CINELIKE
SKIN DTL OFF
V DETAIL THIN


Here are the original scene file settings:
http://eyejazz.com/DVX100/settings_chart.pdf


http://www.dvfilm.com/maker/dvx100settings.htm

DVX100/DVX100A Suggested settings for Transfer to Film or Use with DVFilm Maker
Settings marked in red are the most important. Other settings may be varied if you have a studio-quality monitor (>500 lines resolution) to check the results. Omitted settings are up to the user to determine for best results. Also it is important to use an optical 16:9 adapter with this camera, for transfer to 35mm. See Panasonic accessory AG-LA7200G


SHUTTER = OFF (1/50th). 1/60th sec may also be used, but only to reduce flicker with florescent or arc lighting in 60Hz countries (like the USA).

ATW (Auto Tracking White Balance) = OFF

SCENE FILE:
o DETAIL LEVEL = -3 (see note 1)
o CHROMA LEVEL = 0
o CHROMA PHASE = 0
o COLOR TEMP = 0
o MASTER PED = -6 (see note 2)
o A. IRIS LEVEL = -1
o GAMMA = CINE-LIKE (for DVX100A use CINE-LIKE-V)
o SKIN TONE DTL = OFF
o MATRIX = NORMAL
o V DETAIL FREQ = THIN
o PROGRESSIVE = 24P(ADV) for NTSC / 25P for PAL models
 
I usually do only the following:

Set the chroma, and detail to around -4

Set the master ped to around -7

V Freq to Thin

Cinelike gamma

Normal Matrix

I normally don't use the color temp or phase to achieve color effects.

I do that with gels and variations of white balancing. I'll use them modestly sometimes if I have no control over the lighting.

Example, I did a video where we needed to have bluish moonlight in the interior, so we white balanced the camera on a light salmon-colored paper under the house's tungsten lights.

I use the 3-way color corrector in FCP to effect the color of my footage.
 
mobiledeli, wouldn't setting your detail level to -4 for your TV setting make the image significantly softer? Especially when TV has that videoish look as a result of having the images sharp & not soft? Not to criticise your settings, but just curious. Thanks.
 
andybiz_2005 said:
mobiledeli, wouldn't setting your detail level to -4 for your TV setting make the image significantly softer? Especially when TV has that videoish look as a result of having the images sharp & not soft? Not to criticise your settings, but just curious. Thanks.

You have to try it with Detail down. I DP'd a recent short film for someone, and had Detail at -7, V.Detail at -7, V.Freq Thin, CINE gamma, CINE matrix, and SQUEEZE mode. Along with all the other techniques, it was some of the most film-like footage I have ever shot. It was very sharp at the point of focus, and the backgrounds were smooth and soft. No sharpening artifacts, no noise, it was beautiful.
 
Coring was at the default 0 setting. When you turn Detail down, a lot of the noise just blends in, the sharpening tends to take the noise and accentuate it.
 
Just wanted to share that, once you have your master pedestal set to -12, there is no way to get back any dark shadow or even light shadow information. I would run a test on that setting before shooting something with people and money involved. :)
 
there was a thread with High and Low contrast scene files for HVX
I remember one of the settings was called "promo" I just can't find it :(
 
Last edited:
Good to see this thread kicked up again....

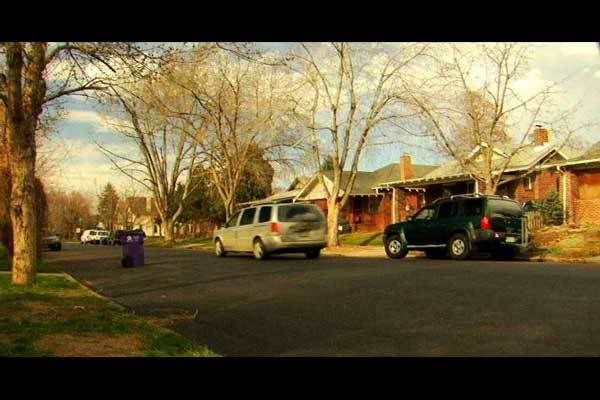
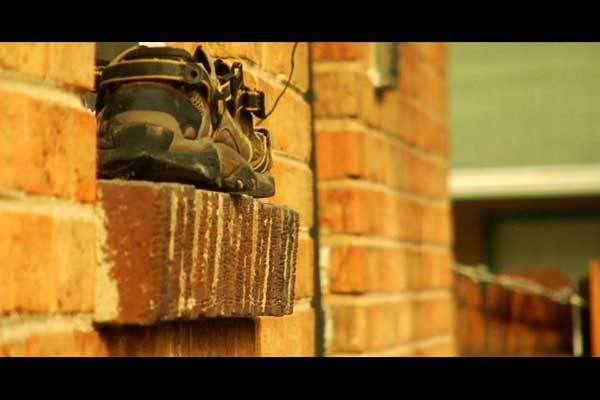
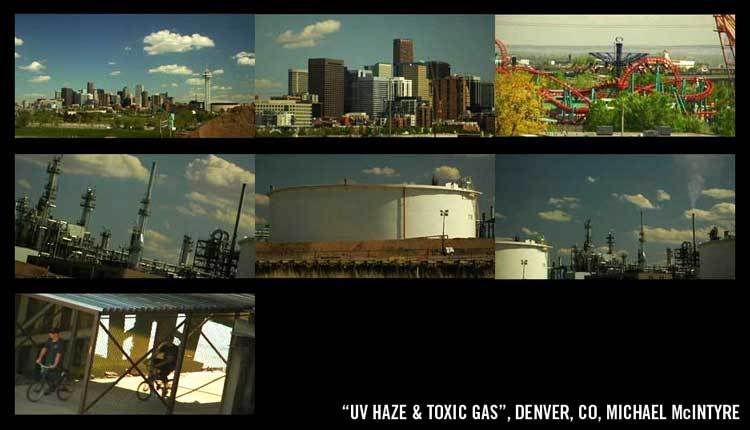
Here's a 'warmish', semi-crushed blacks look.... "Denver Buttered Toast".

I have absolutely no idea why I started calling it that........


DETAIL -3
V DETAIL -1
CORING +2
CHROMA +3
C PHASE 0
COLOR TEMP -2
PED -8
A.IRIS 0
GAMMA CINELIKE V
KNEE n/a
SKIN DTL OFF
V DTL THIN
24p

Road2.jpg

Merrells.jpg
 
UVHaze-COMP1.jpg


DETAIL -2
V DETAIL LEVEL +2
DETAIL CORING +3
CHROMA LEVEL +3
CHROMA PHASE 0
COLOR TEMP -2
MASTER PED -5
A. IRIS LEVEL -2
GAMMA CINELIKE V
KNEE (N/A)
MATRIX CINELIKE
SKIN DTL OFF
V DETAIL FREQ MID
PROGRESSIVE 24pA
 
I spent some time trying out all the setting in this thread. Can someone help me tweak them? For instance I like this one:
Scene Number: 5
Scene Name: 24P

Detail Level: -4
V Detail Level: 0
Detail Coring: 0
Chroma Level: -7
Chroma Phase: +7
Color Temp: -7
Master Ped: -12
A.Iris Level: -2
Gamma: Cine-Like_V
Knee: (Auto)
Matrix: Cine-Like
Skin Tone Dtl: Off
V Detail Freq: Thick
Progressive: 24P

Name Explanation:
This is very similar to the default settings for Scene #5 (24P), except the blacks are much more crushed.

But I felt it gave a Maroon-ish hue to the skin tone. As seen here:
maroon.jpg
maroon2.jpg


What might I do to ease up or move away from the maroon?

I also enjoyed the Minority Report setting:
minority report
detail level 1
v detail level 2
detail coring 6
chroma level 2
chroma phase -4
color temp 4
master ped -11
a iris -4
gamma - cine like v
matrix - flou
24p

Which resulted in this:

minority.jpg
minority2.jpg


What setting will help me remove some of the green?

Here are my results with Saving Private Ryan. The shutter speed effect is cool but I'd like to see better coloring:
ryan.jpg
ryan2.jpg
 
Barrys book will help you tweak those. Im guessing your maroon and green are coming from the chroma phases your using.
 
Back
Top